Reference Guide hp StorageWorks DLT VS80 Tape Drive Third Edition (November 2003) Part Number: 289067-003 This guide is to be used as step-by-step instructions for installation and as a reference for operation, troubleshooting, and future upgrades.
© Copyright 2002-2003 Hewlett-Packard Development Company, L.P. Hewlett-Packard Company makes no warranty of any kind with regard to this material, including, but not limited to, the implied warranties of merchantability and fitness for a particular purpose. Hewlett-Packard shall not be liable for errors contained herein or for incidental or consequential damages in connection with the furnishing, performance, or use of this material.
contents Contents About this Guide. . . . . . . . . . . . . . . . . . . . . . . . . . . . . . . . . . . . . . . . . . . . . . . . . . . .7 Overview. . . . . . . . . . . . . . . . . . . . . . . . . . . . . . . . . . . . . . . . . . . . . . . . . . . . . . . . . . . . . . . . . . 8 Intended Audience . . . . . . . . . . . . . . . . . . . . . . . . . . . . . . . . . . . . . . . . . . . . . . . . . . . . . . . 8 Prerequisites . . . . . . . . . . . . . . . . . . . . . . . . . . . . . . . . . . . . . . . . . . .
Contents Completing the Installation. . . . . . . . . . . . . . . . . . . . . . . . . . . . . . . . . . . . . . . . . . . . . . . . . . . 26 3 Internal Tape Drive Installation . . . . . . . . . . . . . . . . . . . . . . . . . . . . . . . . . . . . . . . .27 Installation Overview . . . . . . . . . . . . . . . . . . . . . . . . . . . . . . . . . . . . . . . . . . . . . . . . . . . . . . . 27 Unpacking the Tape Drive . . . . . . . . . . . . . . . . . . . . . . . . . . . . . . . . . . . . . . . . . . . . . .
Contents Upgrading the Firmware. . . . . . . . . . . . . . . . . . . . . . . . . . . . . . . . . . . . . . . . . . . . . . . . . . . . . 59 A Regulatory Compliance Notices . . . . . . . . . . . . . . . . . . . . . . . . . . . . . . . . . . . . . . . .61 Federal Communications Commission Notice . . . . . . . . . . . . . . . . . . . . . . . . . . . . . . . . . . . . 61 Class A Equipment. . . . . . . . . . . . . . . . . . . . . . . . . . . . . . . . . . . . . . . . . . . . . . . . . . . . . .
Contents 6 DLT VS80 Tape Drive Reference Guide
About This Guide About this Guide This reference guide provides information to help you: ■ Install the DLT VS80 tape About drive this Guide ■ Install the software drivers ■ Operate the DLT VS80 tape drive ■ Troubleshoot the DLT VS80 tape drive Update the firmware on the DLT VS80 tape drive “About this Guide” topics include: ■ Overview, page 8 ■ Conventions, page 9 ■ Rack Stability, page 11 ■ Getting Help, page 12 DLT VS80 Tape Drive Reference Guide 7
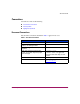
About this Guide Overview This section covers the following topics: ■ Intended Audience ■ Prerequisites ■ Related Documentation Intended Audience This book is intended for use by technicians who are experienced with installing and operating HP tape drives. Prerequisites Before you install the DLT VS80 tape drive, make sure you consider the items below. ■ Review the installation instructions and gather all required tools.
About this Guide Conventions Conventions consist of the following: ■ Document Conventions ■ Text Symbols ■ Equipment Symbols Document Conventions The document conventions included in Table 1 apply in most cases.
About this Guide Text Symbols The following symbols may be found in the text of this guide. They have the following meanings. WARNING: Text set off in this manner indicates that failure to follow directions in the warning could result in bodily harm or death. Caution: Text set off in this manner indicates that failure to follow directions could result in damage to equipment or data. Note: Text set off in this manner presents commentary, sidelights, or interesting points of information.
About this Guide Any surface or area of the equipment marked with these symbols indicates the presence of a hot surface or hot component. Contact with this surface could result in injury. WARNING: To reduce the risk of personal injury from a hot component, allow the surface to cool before touching. Power supplies or systems marked with these symbols indicate the presence of multiple sources of power.
About this Guide Getting Help If you still have a question after reading this guide, contact an HP authorized service provider or access our website: http://www.hp.com. HP Technical Support Telephone numbers for worldwide technical support are listed on the following HP website: http://www.hp.com/support/. From this website, select the country of origin. Note: For continuous quality improvement, calls may be recorded or monitored.
Introduction 1 The HP StorageWorks DLT VS80 Tape Drive is a value-priced, high-capacity streaming cartridge tape drive designed for use with HP systems. The drive has a dual-channel read/write head, Lempel-Ziv (DLZ) high-efficiency data compression, and tape-mark directory to achieve fast data throughput and access times. Figure 1: DLT VS80 tape drive Previously Recorded Media The DLT VS80 can read DLTtape™IV media previously recorded using a DLT 20/40 format.
Introduction Software Included The DLT VS80 tape drive ships with a CD that contains Microsoft certified drivers that support the Microsoft Windows NT, Windows 2000, or Windows Advanced Server 2003 operating systems. Multiple software utilities are also available to customers through the HP website and can be downloaded free of charge. System Requirements Your DLT VS80 tape drive requires a wide, SCSI-2, Low Voltage Differential (LVD) or Single-Ended (SE) SCSI bus.
Introduction Data Compression The DLT VS80 tape drive offers a formatted, native cartridge capacity of 40 GB (80 GB assuming a 2:1 compression ratio) and a sustained user data transfer rate of 3 MB/s (up to 6 MB/s with 2:1 compression). Note: Capacity may vary based upon actual stored data. Data transfer rate can vary depending on actual data. The DLT VS80 tape drive ships from the factory with data compression enabled for writing.
Introduction 16 DLT VS80 Tape Drive Reference Guide
External Tape Drive Installation 2 Installing the DLT VS80 external tape drive requires no special tools. You will need a ballpoint pen to change the SCSI ID switch on the rear panel of the drive. WARNING: Risk of electric shock. Do not attempt to open this product. There are no user-serviceable parts inside. Refer all service to an HP authorized service provider. Installation Overview 1. Unpack the drive and check for shipping damage. 2.
External Tape Drive Installation Unpacking the Tape Drive Caution: If the room where you are unpacking the drive differs from the temperature at which the tape drive was shipped or stored by 30º F (15º C) or more, let the drive acclimate to the surrounding environment for at least 12 hours before opening the shipping carton. Unpack and inspect the tape drive for shipping damage: 1. Inspect the shipping box for damage. If you notice any damage, report it to the shipping company immediately. 2.
External Tape Drive Installation Selecting an Installation Location Select an installation location that is flat, sturdy, level, and close to the host server. A desk or table top is most suitable. Regardless of the location you choose for the external DLT VS80 tape drive, make sure the environment is free from dust and excessive temperature and humidity. See Appendix C, “Specifications,” for acceptable operating temperature and humidity limits.
External Tape Drive Installation Setting the SCSI ID Each SCSI device attached to the server that is to be the host for the DLT VS80 tape drive must have a unique SCSI ID. Check the SCSI IDs on all other devices attached to the selected SCSI bus, including the SCSI host adapter itself, on the selected server and select an unused SCSI ID for the tape drive. If the drive factory default SCSI ID 6 is not being used by another device on the same SCSI bus, you do not need to change the SCSI ID.
External Tape Drive Installation To set the SCSI ID use a small screwdriver or ballpoint pen to press the button above or below the SCSI ID display. ■ Press the button above the SCSI ID display 1 to select the next lower SCSI ID. ■ Press the button below the SCSI ID display 2 to select the next higher SCSI ID. Each time you press one of these buttons, the SCSI ID decreases or increases by one. Press the appropriate button until the desired SCSI ID appears on the switch display.
External Tape Drive Installation Connecting a Single Drive If the selected server does not already have an LVD/SE SCSI host adapter installed, install one now. To connect the SCSI and power cables: 1. Shut down the operating system and power off the selected server. Turn off all attached peripherals such as printers and other SCSI devices. Remove the power cable from the host server and all attached peripherals.
External Tape Drive Installation 3 1 2 3 4 Figure 4: Connecting a single external drive 3. Attach the SCSI signal cable 1 to the SCSI connector 2 location on the rear panel of the DLT VS80 tape drive and then to the external SCSI-2 port on the server. 4. Tighten the thumbscrews to secure the cable to the connector. 5. Attach the terminator 3 to the SCSI connector. WARNING: To reduce the risk of electric shock or damage to your equipment, do not disable the power cord grounding feature.
External Tape Drive Installation Note: To daisy-chain, you must purchase additional cables. Refer to the Quick Specs at http://www.hp.com for cable option part numbers. 1 2 Figure 5: Daisy-chaining several external drives 1 2 To SCSI host adapter Terminator Note: Each tape drive in the daisy-chain must have a unique SCSI ID. See “Setting the SCSI ID” in this chapter.
External Tape Drive Installation Terminating the Tape Drive If the DLT VS80 tape drive is the only SCSI device – other than the SCSI host adapter – on the selected server, it must be terminated. Likewise, if the DLT VS80 tape drive is the last device on the selected server SCSI bus, it must be terminated. If the DLT VS80 tape drive is at the end of the SCSI cable, it is the last device on the SCSI bus.
External Tape Drive Installation Verifying the Tape Drive Installation Every time the DLT VS80 tape drive is powered on, it conducts a Power-On Self-Test (POST) to ensure that the drive is working properly and ready to use. While POST is in progress, watch the front panel LEDs to see the progress and results of the test. During POST, the following actions take place: 1. The LEDs turn on all at once and then turn off. 2. The Ready (green) LED blinks during initialization and remains illuminated after POST.
Internal Tape Drive Installation 3 The following items may be required for DLT VS80 tape drive installation: ■ Torx T-15 screwdriver ■ Type 1A, Phillips screwdriver Installation Overview 1. Unpack the drive and check for shipping damage. 2. Select a server that is to be the host for the DLT VS80 tape drive. 3. Set the SCSI ID, if necessary. 4. Shut down and turn off the server that is to host to the tape drive. Remove the power cable from the selected server.
Internal Tape Drive Installation 12. Secure the tape drive in the selected server. 13. Replace the server cover, attach power cables to all devices, power on the server and other devices. 14. Install software drivers, if necessary. 15. Verify that the tape drive is working properly.
Internal Tape Drive Installation Setting the SCSI ID Each SCSI device attached to the server that is to be the host for the DLT VS80 tape drive must have a unique SCSI ID. Check the SCSI IDs on all other devices attached to the selected SCSI bus, including the SCSI host adapter itself, on the selected server and select an unused SCSI ID for the tape drive. If the drive factory default SCSI ID 6 is not being used by another device on the same SCSI bus, you do not need to change the SCSI ID.
Internal Tape Drive Installation Locate the SCSI ID jumpers on the rear panel of the drive as shown in Figure 7. Use Figure 8 to select the desired SCSI ID. SCSI ID 0 1 2 3 4 5 6 Jumper Block Figure 8: SCSI ID settings Note: SCSI ID 7 is reserved for the controller. The SCSI ID can be set up to 15, but a SCSI ID above 6 is not recommended.
Internal Tape Drive Installation Figure 9: Ribbon cable with terminator Installing the Internal Tape Drive Caution: Electrostatic discharge (ESD) can damage electronic components. Be sure you are properly grounded before beginning this procedure. See Appendix B, “Electrostatic Discharge,” for additional information. 1. Shut down the operating system and power off the selected server. Turn off all attached peripherals such as printers and other SCSI devices.
Internal Tape Drive Installation Note: Your server may differ from the following illustrations; refer to the documentation included with your server. SELECT EJECT ENTER Figure 10: Installing an internal drive 3. Install an LVD/SE SCSI host adapter in the server that is to be the host for the drive, if necessary. 4. If necessary, attach the drive rails that ship with the drive. Note: You may need to use the rails that ship with your server.
Internal Tape Drive Installation 1 2 Figure 11: Connecting the power and signal cable 1 2 Signal cable Power cable 8. Attach the other end of the SCSI ribbon cable to the SCSI host adapter. 9. Replace the cover on the server. 10. Plug in the AC power cords for any peripheral devices and power all of them on. 11. Plug in the AC power cord for the server and power it on.
Internal Tape Drive Installation Verifying the Tape Drive Installation Every time the DLT VS80 tape drive is powered on, it conducts a Power-On Self-Test (POST) to ensure that the drive is working properly and ready to use. While POST is in progress, watch the front panel LEDs to see the progress and results of the test. During POST, the following actions take place: 1. The LEDs turn on all at once and then turn off. 2. The Ready (green) LED blinks during initialization and remains illuminated after POST.
Operating System Device Drivers 4 The following operating systems support the HP StorageWorks DLT VS80 tape drive: ■ Microsoft® Windows NT 4.0 ■ Microsoft Windows 2000 ■ Microsoft Windows Advanced Server 2003 ■ Novell NetWare ■ HP Tru64 UNIX ■ Red Hat Linux ■ SuSe Linux For an updated list of supported operating systems, refer to: http://www.hp.com.
Operating System Device Drivers Installing Drivers on Windows NT 4.0 These instructions apply to the Windows NT Backup Utility and other applications that don't provide their own drivers. Note: Before starting the driver installation, verify that your tape drive is properly connected. Windows NT 4.0 only allows you to install tape device drivers sequentially.
Operating System Device Drivers Installing Drivers on Windows 2000 These instructions apply to the Windows Backup Utility. 1. Right-click the My Computer icon and select Manage. 2. Select Device Manager on the left panel to display all the devices on the right panel on the Computer Management console. Make all subsequent selections from the devices shown in the right panel. 3. If the tape drive has not yet been installed, connect the device and select Scan for hardware changes to detect the device.
Operating System Device Drivers Installing Drivers on Advanced Server 2003 These instructions apply to the Windows Backup Utility. 1. Right-click the My Computer icon and select Manage. 2. Right-click on the device in the list and select Update Driver. 3. If the tape drive has not yet been installed, connect the device and select Scan for hardware changes to detect the device. At first, the device might be displayed in the “other device” category under the ? icon.
Operating System Device Drivers Novell NetWare The tape device driver is located with the operating system. Refer to the backup application installation guide for more information regarding additional software that might be needed. Table 2 provides a list of supported controllers and where to get information about the software driver: Table 2: Novell NetWare Controller Wide-Ultra SCSI Ultra-2 SCSI Software Driver Information Run the Readme.
Operating System Device Drivers HP Tru64 UNIX The HP Tru64 UNIX operating system uses Dynamic Device Recognition (DDR) which allows the operating system to recognize the DLT VS80 tape drive. If the Tru64 UNIX system does not have a DDR entry to identify the DLT VS80 tape drive, the system defaults to a generic SCSI device and to the default settings of the tape drive. DDR Recognition Note: Starting with UNIX 5.1, the syntax for tape related commands changed.
Operating System Device Drivers Turning Compression On or Off The following sections give two examples of turning compression on or off using the tar command. Example 1 - Turning Compression On An example to turn on compression using a tar command is: $tar cvf /dev/tape/tape5_d? filename.txt Where: ■ tape5 = the tape device as known by the system (shown in the file command, in this case, tape unit 5). ■ ? = 1, 3, 5 or 7 will turn hardware compression on.
Operating System Device Drivers Red Hat Linux Red Hat Linux provides native drive recognition. Drive files are located in the /dev directory. Supplemental drivers are not required. The operating system defaults to a generic SCSI device and to the default settings of the tape drive. Table 3: Typical Native OS Commands Task Command Tar Write tar cvf /dev/st0 ./largefile Tar Read tar xvf /dev/st0 DD Write dd if=./largefile of=//dev/st0 bs=51 DD Read dd if=//dev/st0 of=.
Operating the DLT VS80 Tape Drive 5 This chapter describes: ■ Front Panel Controls and Indicators ■ Using Cartridges — Inserting a cartridge — Removing a cartridge — Write-Protecting a cartridge — Caring for cartridges — Using the cleaning cartridge DLT VS80 Tape Drive Reference Guide 43
Operating the DLT VS80 Tape Drive Front Panel Controls and Indicators Every time the DLT VS80 tape drive is powered on, it conducts a Power-On Self-Test (POST) to ensure that the drive is working properly and ready to use. While POST is in progress, watch the front panel LEDs to see the progress and results of the test. During POST, the following actions take place: 1. The LEDs turn on all at once and then turn off. 2. The Ready (green) LED blinks during initialization and remains illuminated after POST.
Operating the DLT VS80 Tape Drive Table 5 describes the meaning of the front panel LEDs. Table 5: Indicator Activity Indicator Drive error (amber) Ready (green) Clean/Media (amber) State Operating Condition Blinking An unrecoverable drive error or a POST error has occurred. Call Technical Support. Off No drive errors. On Power to the drive. Off No power to the drive. Blinking (constant period & duty cycle) Tape is in motion.
Operating the DLT VS80 Tape Drive Using Cartridges The DLT VS80 tape drive uses only DLTtape™IV cartridges. The DLT VS80 tape drive automatically unloads any other cartridge types and any cartridges whose format it cannot read. Make sure all cartridges that you want to use for writing are either unformatted or have been formatted with the DLT VS80 tape drive before loading them. The DLT VS80 tape drive can use previously written media that has been degaussed. DLTtape™IV media is rated at 1850 oersteds.
Operating the DLT VS80 Tape Drive Inserting a Cartridge To load a cartridge into the DLT VS80 tape drive: 1. Insert the DLTtape IV cartridge into the cartridge slot after the drive completes POST. See Figure 13. 2. Gently push the cartridge into the drive until it stops.
Operating the DLT VS80 Tape Drive Removing a Cartridge Caution: To avoid damage to the cartridge or the tape drive, remove the cartridge from the DLT VS80 tape drive before turning off the drive. Leaving a cartridge in the drive when power is off can result in cartridge and drive damage and may cause data loss because the header/catalog data may not be properly written before the drive loses power. To remove a cartridge: 1. Press the Unload button or use the backup software to unload the cartridge.
Operating the DLT VS80 Tape Drive Write-Protecting a Cartridge All DLTtape IV cartridges have a write-protect switch to prevent accidental erasure of data. Before loading the cartridge into the drive, position the write-protect switch on the front of the cartridge. By moving the switch to the left 1, the cartridge is write-protected. By moving the switch to the right 2, the cartridge is write-enabled.
Operating the DLT VS80 Tape Drive ■ Store cartridges in a dust-free environment where the relative humidity is between 20% and 80% (noncondensing). For longer cartridge life, store the cartridge at 20% to 80% relative humidity. ■ Store cartridges in their storage cases. ■ Do not drop or strike a cartridge. Excessive shock can displace the tape leader, making the cartridge unusable and possibly damaging your DLT VS80 tape drive.
Operating the DLT VS80 Tape Drive Using the Cleaning Cartridge When the Clean/Media LED is on, the DLT VS80 tape drive read/write head may need to be cleaned. Insert the cleaning cartridge as you would a data cartridge. See “Inserting a Cartridge.” Cleaning typically takes several minutes during which the Ready LED blinks. You should only use DLT 1/DLT VS Cleaning Cartridges, which are a smoky-gray color. Inappropriate cleaning tapes are immediately ejected.
Operating the DLT VS80 Tape Drive 52 DLT VS80 Tape Drive Reference Guide
Troubleshooting and Upgrading the Firmware 6 Troubleshooting The HP Library and Tape Tool (L&TT) is a tape management and diagnostic tool. In addition to the diagnostic and troubleshooting ability of L&TT, it offers useful information about your products and provides automated firmware update checks from the Internet, with the ability to retrieve the latest firmware versions. Use L&TT to perform a first level failure analysis.
Troubleshooting and Upgrading the Firmware Table 7: Troubleshooting Symptom 54 Problem Solution None of the drive’s LEDs illuminate. The drive is not receiving power. Check the drive’s power cable. If an external drive, check the power cable connections. Plug the power cable into a different power outlet. All of the LEDs on the front panel blink continually. An internal drive fault has occurred. 1.
Troubleshooting and Upgrading the Firmware Table 7: Troubleshooting Symptom The host server does not recognize your DLT VS80 tape drive. (continued) DLT VS80 Tape Drive Reference Guide Problem Solution The SCSI terminator might be loose or missing. 1. Make sure the terminator is properly seated on the open SCSI connector on the rear panel of the desktop drive or on the last device on the SCSI bus. 2. Make sure an LVD/SE terminator is in place on the end of the SCSI ribbon cable for the internal drive.
Troubleshooting and Upgrading the Firmware Table 7: Troubleshooting 56 Symptom Problem Solution The host server does not recognize your DLT VS80 tape drive. (continued) The SCSI bus might be too long. Make sure the total length of the SCSI bus does not exceed the ANSI SCSI standard of 40 feet (12.2 meters) for an LVD SCSI bus with multiple devices, 82 feet (25 meters) for an LVD SCSI bus with a single device, or 10 feet (3.05 meters) for a Fast SCSI-2 or Ultra SCSI-1SE bus.
Troubleshooting and Upgrading the Firmware Table 7: Troubleshooting Symptom Drive will not read or write to media. DLT VS80 Tape Drive Reference Guide Problem Media or format not supported by tape drive. Solution 1. DLT IV cartridge contains data written by a DLT 20/40 drive. Tape drive cannot overwrite tape with DLT 20/40 data. You must degauss the media to be able to write VS80 formatted data onto tape. See Table 6 for media compatibility. 2.
Troubleshooting and Upgrading the Firmware Table 7: Troubleshooting Symptom Drive will not eject a DLTtape IV cartridge 58 Problem Drive has malfunctioned or the cartridge is physically stuck. Solution 1. Allow sufficient time for the drive to complete any operations such as POST, reset, load, unload, rewind, and so on. For example, when powering up the drive with the tape positioned at Physical End of Media, recovery could take up to ten minutes. 2.
Troubleshooting and Upgrading the Firmware Upgrading the Firmware The HP Library and Tape Tool (L&TT) is a tape management and diagnostic tool to help you install and support your HP storage product. In addition to the diagnostic and troubleshooting ability of L&TT, it offers useful information about your products and provides automated firmware update checks from the Internet, with the ability to retrieve the latest firmware versions.
Troubleshooting and Upgrading the Firmware 60 DLT VS80 Tape Drive Reference Guide
Regulatory Compliance Notices A Federal Communications Commission Notice Part 15 of the Federal Communications Commission (FCC) Rules and Regulations has established Radio Frequency (RF) emission limits to provide an interference-free radio frequency spectrum. Many electronic devices, including computers, generate RF energy incidental to their intended function and are, therefore, covered by these rules.
Regulatory Compliance Notices Class B Equipment This equipment has been tested and found to comply with the limits for a Class B digital device, pursuant to Part 15 of the FCC Rules. These limits are designed to provide reasonable protection against harmful interference in a residential installation. This equipment generates, uses, and can radiate radio frequency energy and, if not installed and used in accordance with the instructions, may cause harmful interference to radio communications.
Regulatory Compliance Notices For questions regarding your product, contact: Hewlett-Packard Company P. O. Box 692000, Mail Stop 530113 Houston, Texas 77269-2000 Or, call 1-800- 652-6672 For questions regarding this FCC declaration, contact: Hewlett-Packard Company P. O. Box 692000, Mail Stop 510101 Houston, Texas 77269-2000 Or, call (281) 514-3333 To identify this product, refer to the Part, Series, or Model number found on the product.
Regulatory Compliance Notices European Union Notice Products bearing the CE marking comply with the EMC Directive (89/336/EEC) and the Low Voltage Directive (73/23/EEC) issued by the Commission of the European Community and if this product has telecommunication functionality, the R&TTE Directive (1999/5/EC).
Regulatory Compliance Notices BSMI Notice Japanese Notice DLT VS80 Tape Drive Reference Guide 65
Regulatory Compliance Notices 66 DLT VS80 Tape Drive Reference Guide
Electrostatic Discharge B To prevent damage to the system, be aware of the precautions you need to follow when setting up the system or handling parts. A discharge of static electricity from a finger or other conductor may damage system boards or other static-sensitive devices. This type of damage may reduce the life expectancy of the device. To prevent electrostatic damage, observe the following precautions: ■ Avoid hand contact by transporting and storing products in static-safe containers.
Electrostatic Discharge Grounding Methods There are several methods for grounding. Use one or more of the following methods when handling or installing electrostatic-sensitive parts: ■ Use a wrist strap connected by a ground cord to a grounded workstation or computer chassis. Wrist straps are flexible straps with a minimum of 1 megohm ± 10 percent resistance in the ground cords. To provide proper grounding, wear the strap snug against the skin.
C Specifications Dimensions and Weight Table 8: Dimensions and Weight Dimension Internal Drive External Drive Height 1.725 in (43.82 mm) with bezel 1.625 in (41.28 mm) without bezel 2.608 in (66.25 mm) Width 5.750 in (146.05 mm) behind bezel 5.834 in (148.19 mm) with bezel 8.352 in (212.15 mm) Length 8.509 in (216.13 mm) measured from back of front bezel 8.699 in (220.96 mm) including the bezel 10.728 in (272.50 mm) Weight 3.2 lbs (1.46 kg) 7.67 lbs (3.48 kg) Shipping Weight 4.59 lbs (2.
Specifications Acoustic Emissions Acoustic - declared values per ISO9296 and ISO 7779/EN27779. Table 10: Acoustic Emissions Sound Power Level Sound Pressure Level LwA,B LpAm, dBA (bystander position) Idle Operate Idle Operate N/A 5.3 N/A 46 Temperature and Humidity Ranges Table 11: Temperature and Humidity Ranges Actions Operating Non-operating (mech.
Specifications Power Requirements Table 12: Power Requirements - Internal Drives Voltage Typical Maximum +5 V (+/-5%) bus* 1.6 A 1.9 A +12 V (+/-5%) bus* 0.65 A 3.5 A * Voltage is measured at the power bus connector pins. Table 13: Power Requirements - External Drive Voltage Maximum Power 100-240V VAC Less than 35 W Airflow Requirement Table 14: Airflow Requirements Airflow Velocity Greater than 2.
Specifications 72 DLT VS80 Tape Drive Reference Guide
Index A operating systems 35 where to locate them 35 document conventions 9 prerequisites 8 related documentation 8 Dynamic Device Recognition see DDR ASPI support 39 audience 8 authorized reseller, HP 12 C D data compression 15 DDR 40 examples of turning on compression 41 recognition 40 Device Driver Functional Specification 39 device drivers DLT VS80 Tape Drive Reference Guide Index E Index cartridge approved 46 caring for 49 cleaning 51 inserting 47 removing 48 write-protecting 49 cleaning cart
Index H O help, obtaining 12 HP authorized reseller 12 storage website 12 technical support 12 HP Tru64 UNIX DDR entry 40 no DDR entry 40 operating system device drivers 35 I installation external drive 17 installing internal drive 27 Intel-based systems device drivers 35 internal drive installing 27 setting SCSI ID 29 terminating 30 unpacking 28 verifying installation 34 L latest UNIX patches 41 LED indicators 44 M Microsoft Advanced Server 2003 38 Microsoft Windows 2000 37 Microsoft Windows NT 4.
Index T V tape backup applications 39 technical support, HP 12 termination external drive 25 internal drive 30 text symbols 10 troubleshooting 53 Veritas BackupExec 39 DLT VS80 Tape Drive Reference Guide W warning rack stability 11 symbols on equipment 10 websites HP storage 12 75
Index 76 DLT VS80 Tape Drive Reference Guide