
Storage Manager 60-NT Introduction Guide


Managing Storage Arrays . . . . . . . . . . . . . . . . . . . . . . . . . . . . . . . . . . . . . . . . . . . . . . . . . . . . . . . . .
18 M
ANAGING STORAGE ARRAYS
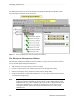
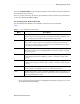
$UUD\0DQDJHPHQW:LQGRZ7RROEDU
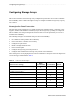
7KH$UUD\0DQDJHPHQW:LQGRZWRROEDUEXWWRQVDUHGHVFULEHGLQ7DEOH
For more information on using the toolbar options, see the Array Management Window
Help.
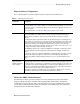
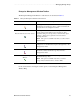
7DEOH $UUD\0DQDJHPHQW:LQGRZ7RROEDU%XWWRQV
Toolbar button Description
Create new volumes (and volume
groups, if applicable)
Selecting this button allows you to create volume groups and
volumes.
NOTE You must select either a Free Capacity Node or an
Unconfigured Capacity Node in the Logical View before this
option is available. If you select a Free Capacity Node, the
option is called Create New Volumes. If you select an
Unconfigured Capacity Node, the option is called Create New
Volume Groups/Volumes.
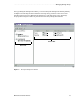
Configure storage partitioning
Selecting this button allows you to define the topological
elements attached to your Storage Array and define volume-to-
LUN mappings to create storage partitions. For more
information on storage partitions, go to page 25.
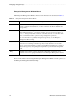
View diagnostic event log Selecting this button opens the Event Log Viewer.
NOTE This log is for customer support use.
Monitor performance Selecting this button opens the Performance Monitor.
Recover from failures Selecting this button opens the Recovery Guru.
NOTE If the Storage Array is in a Needs Attention state ,
the Recovery Guru toolbar button flashes.