
HP SureStore E Disk Array FC60 Service Manual (A5635A)


300 Disk Enclosure Modules
BCC Module Removal/Replacement
The BCC is not a hot-swappable component. The disk enclosure must be powered off when
removing or replacing the BCC. Powering down the disk enclosure will impact the
operation of any LUNs using disks in the enclosure. The loss of the disks may initiate a
rebuild for any LUN included on the disks.
Note
When the BCC replacement is completed and the disk enclosure is powered up,
the array may perform a rebuild or copy-back to the disks. depending on the
amount of data involved, this process may take some to complete.
To replace a BCC module, complete the following steps:
C
AUTION
Do not remove a BCC until you have a replacement. An empty slot will cause
uneven cooling and possible overheating.
1. Open the disk enclosure front door.
2. Power the disk enclosure down by setting the power switch to off.
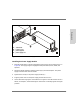
3. Disconnect the SCSI cable from the controller enclosure connector.
4. Disconnect the SCSI cable from the BCC.
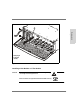
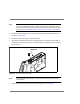
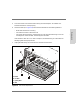
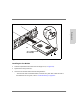
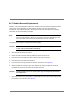
5. Loosen the two locking screws from the back of the BCC. See Figure 95.
6. Attach the ESD wrist strap to your wrist and the clip end to the ground connector
located at the top, front, left corner of the disk enclosure.
C
AUTION
Touching the BCC pins can cause high energy discharge and permanently
damage the BCC.
7. Open the cam levers by pulling them out and away from the center of the module, then
pull the BCC out of its slot. See Figure 95.