
User's Manual
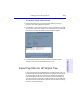


Table Of Contents
- Hewlett-Packard Limited Warranty Statement
- HP Software License Agreement
- Chapter 1: Connecting CD-Writer Plus and Installing Software
- Chapter 2: Using Your CD-Writer Plus
- Chapter 3: Problem Solving
- Chapter 4: Sharing Your CDs
- Chapter 5: Making Data CDs
- Chapter 6: Making Music CDs
- Chapter 7: making Inserts and Labels
- Chapter 8: Copying CDs
- Chapter 9: Find Files Fast with HP Simple Trax
- What Simple Trax Can Do for You
- Copying Files to CD
- Automatically Copying Files to CD
- Preparing a CD for Automatic Operations
- To Verify Your Schedule Settings
- To Change a Schedule
- Browsing Your Simple Trax CDs
- Finding Files On Your CD
- Copying Files and Folders Back to Your Hard Drive
- Retrieving an Earlier Version of a File
- Importing CDs into HP Simple Trax
- Event Logs
- Changing the Index Display
- Chapter 10: HP Disaster Recovery
- Appendix A: Technical Specifications
- Appendix B: Customer Support
- Index

Getting Started 10-3
Chapter 10: HP Disaster
Recovery
Partitioning Your Drive(s)
In the event that you must perform a recovery, HP Disaster Recovery will
require that you partition your new drive(s) to the same settings as were
set before the drive failure. In order to do this, it may be helpful to make
a record of your current partition settings on paper and keep an updated
record of these settings with each DR Set.
What is a partition? A partition is a logical section of your hard
disk. One physical hard disk may be partitioned into two or more
logical hard-drives.
To make a record of your partition settings:
1. Double-click the My Computer icon located on your desktop.
The My Computer Window appears.
2. Select Details from the View menu.
A list of drive types will appear under the Type heading, to the right of
your drive letter.
3. Under the Name heading, right-click on the drive letter listed as a Local
Disk, then select Properties.
The selected drive’s Properties dialog box appears.
4. Write down the information displayed in the Type dialog.
5. Write down the information displayed in the Capacity dialog.
6. Repeat steps 3-5 for each Local Disk on your computer.
Testing your Disaster Recovery Set
After you have created the DR Set, you will be asked if you would like to
test the DR Set. Testing the DR Set is very similar to performing an actual
recovery; however, be sure to stop testing when instructed to do so. This
test is to verify that your drive is responding properly.
To test your Windows 95/98 Disaster Recovery Set:
1. Follow steps 1 through 8 in the Windows 95 and Windows 98 section of
“Recovering Your Data.”