
User's Manual

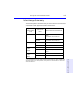

Table Of Contents
- Hewlett-Packard Limited Warranty Statement
- HP Software License Agreement
- Chapter 1: Connecting CD-Writer Plus and Installing Software
- Chapter 2: Using Your CD-Writer Plus
- Chapter 3: Problem Solving
- Chapter 4: Sharing Your CDs
- Chapter 5: Making Data CDs
- Chapter 6: Making Music CDs
- Chapter 7: making Inserts and Labels
- Chapter 8: Copying CDs
- Chapter 9: Find Files Fast with HP Simple Trax
- What Simple Trax Can Do for You
- Copying Files to CD
- Automatically Copying Files to CD
- Preparing a CD for Automatic Operations
- To Verify Your Schedule Settings
- To Change a Schedule
- Browsing Your Simple Trax CDs
- Finding Files On Your CD
- Copying Files and Folders Back to Your Hard Drive
- Retrieving an Earlier Version of a File
- Importing CDs into HP Simple Trax
- Event Logs
- Changing the Index Display
- Chapter 10: HP Disaster Recovery
- Appendix A: Technical Specifications
- Appendix B: Customer Support
- Index

Making Data CDs to Use on Different Types of Computers 5-7
Chapter 5: Making Data CDs
NOTE: If the screen does not appear after about 15seconds, you may have
inserted a disc that is already formatted. Remove the disc and insert a blank
disc. Or the “Auto insert notification” option may be disabled (this applies to
Windows95 only). To check this, click Start, move the mouse pointer over
Settings, and click Control Panel. In Control Panel, double-click System and
select the Device Manager tab. Double-click the icon for the CD-Writer Plus,
then select the Settings tab. Click Auto insert notification if it does not have
a check mark next to it, and click OK. Click OK on the System Properties dialog
box. Then close the Control Panel.
3. Select the second option: Click here to create a data CD for
distribution among different types of computers. The EasyCDCreator
Wizard appears.
4. Leave the Data CD radio button selected, and click Next.
5. When the next screen appears, select the files and folders you want to
copy to the disc and click Add Now. The graph bar in the lower part of
the screen indicates how much space is left on the disc.
6. When you are done adding files, click Next. The Test Before Writing
window appears.
7. Click Next, then click Finish on the Ready to Create CD window to
create the CD. The testing and copying process may take a long time if
you are copying many folders and files.
8. When the testing and copying process is completed, eject the CD from
the drive.
NOTE: These instructions describe the simplest, most direct way to create a
data disc with EasyCDCreator. Other options are also available, such as re-
arranging the folder/file structure after you have selected the files to copy to the
CD. See the EasyCDCreator online help for more information.