
User's Manual
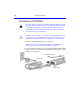

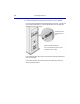
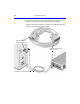
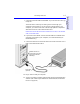
Table Of Contents
- Hewlett-Packard Limited Warranty Statement
- HP Software License Agreement
- Chapter 1: Connecting CD-Writer Plus and Installing Software
- Chapter 2: Using Your CD-Writer Plus
- Chapter 3: Problem Solving
- Chapter 4: Sharing Your CDs
- Chapter 5: Making Data CDs
- Chapter 6: Making Music CDs
- Chapter 7: making Inserts and Labels
- Chapter 8: Copying CDs
- Chapter 9: Find Files Fast with HP Simple Trax
- What Simple Trax Can Do for You
- Copying Files to CD
- Automatically Copying Files to CD
- Preparing a CD for Automatic Operations
- To Verify Your Schedule Settings
- To Change a Schedule
- Browsing Your Simple Trax CDs
- Finding Files On Your CD
- Copying Files and Folders Back to Your Hard Drive
- Retrieving an Earlier Version of a File
- Importing CDs into HP Simple Trax
- Event Logs
- Changing the Index Display
- Chapter 10: HP Disaster Recovery
- Appendix A: Technical Specifications
- Appendix B: Customer Support
- Index
Connecting CD-Writer 1-3
Chapter 1: Connecting CD-
Writer Plus and Installing
Software
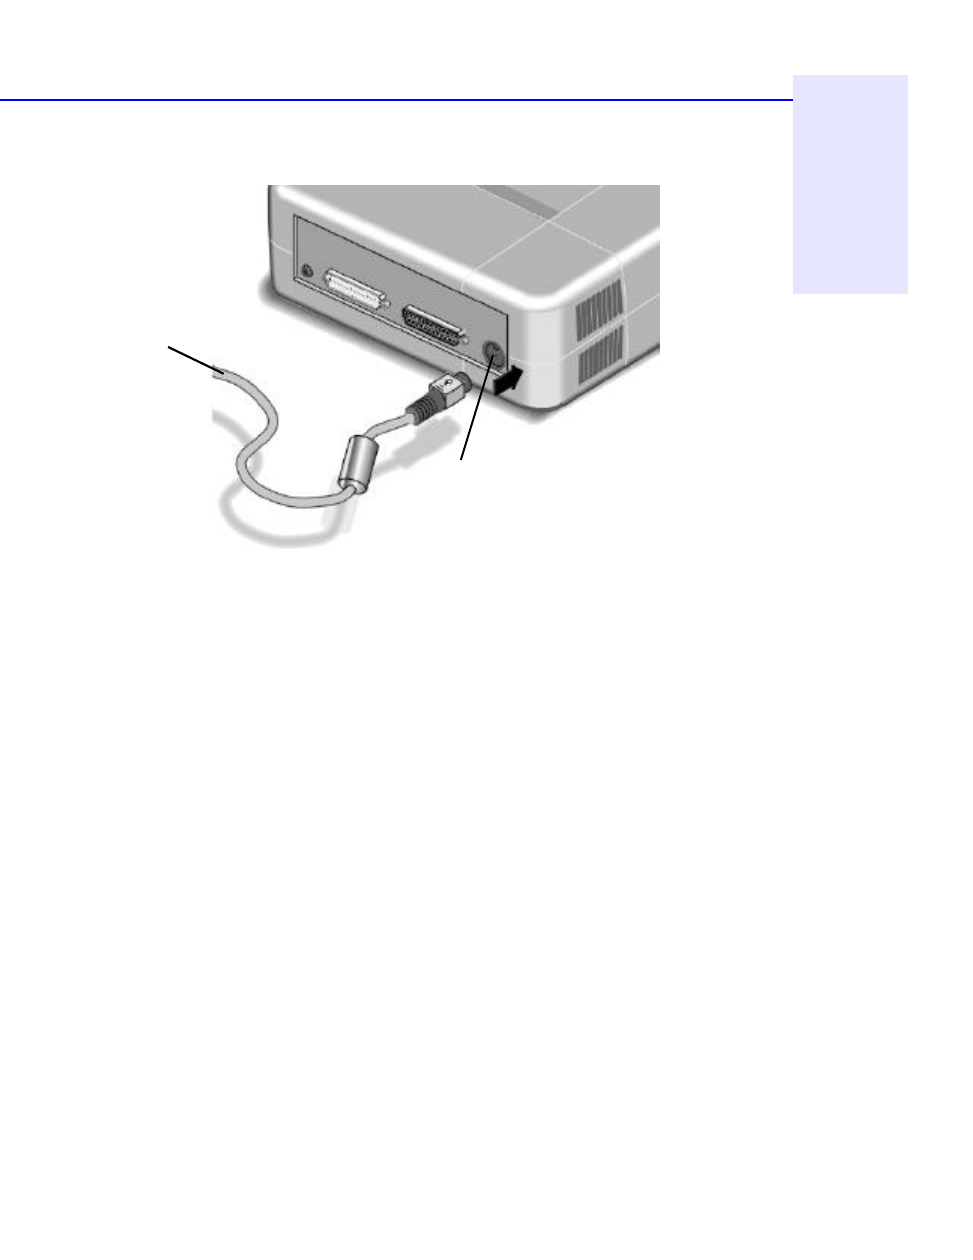
3. Connect the power supply to the power connector on the back of the
CD-Writer Plus drive, with the arrow on the cable facing up.
Check that you have power to the CD-Writer Plus drive by opening and
closing the CD tray by pressing the eject button.
NOTE: There is no power switch on the CD-Writer Plus drive or power supply.
The energy-efficient power supply automatically switches into power-saving
mode when the drive is not in use, and may be safely left plugged in at all
times. However, you may safely unplug the power supply without causing
damage to the CD-Writer Plus drive.
(arrow up)
Power connector
To power supply