
HP StoreEver MSL6480 Tape Library User and Service Guide

Using the KMIP Wizard
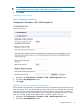
1. In the Configuration area, click KMIP Wizard in the Encryption menu to start the wizard.
2. The Wizard Information screen displays information about the wizard. If the library
configuration is complete and the KMIP server is available on the network, click Next.
3. The Certificate Authority Information screen displays prerequisites for using the KMIP certificate.
When the prerequisites are met, click Next.
4. The Certificate Authority Certificate Entry screen displays instructions for obtaining the certificate
for the KMIP server. Follow the instructions to copy the certificate from the management console.
Paste the certificate into the wizard and then click Next.
5. The Library Certificate Information screen displays information about the next wizard steps.
Click Next.
6. In the KMIP Client Configuration screen, enter the username and password that the library will
use to communicate with the KMIP server and then click Next.
7. The Certificate Generation screen displays the current library certificate, if one exists.
To use the current certificate, select Keep Current Certificate and then click Next.
To generate a new certificate, select Generate New Certificate. The wizard will generate and
display a new library certificate. Click Select Certificate to copy the new certificate text and
then click Next.
8. If you selected Generate New Certificate, the Sign Library Certificate screen displays the new
certificate for the library. Sign the new library certificate with the certificate authority as a
client certificate, paste the new KMIP certificate in the box, and then click Next.
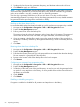
9. In the KMIP Server Configuration screen, enter the IP address or fully-qualified hostname and
port number for up to ten KMIP servers. To verify access to the KMIP servers, click Connectivity
Check.
10. In the KMIP Partition Enablement screen, select KMIP Enabled to configure partitions for use
with KMIP, and then click Next.
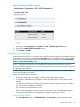
11. The Setup Summary screen displays the settings that were collected by the wizard. Verify that
the settings are correct and that there are no errors in the Done column. If you need to modify
any settings or fix any issues, either click Back to reach the applicable screen or Cancel out
of the wizard to fix the issues and return later.
If the settings are correct and there are no errors, click Finish.
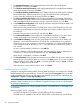
Configuring user accounts
From the Configuration > User Accounts screen you can set the password for the user, administrator,
or security accounts.
• User — The user account allows access to library status information and does not allow
access to configuration, maintenance, or operation features. A password is not required for
the user account. Setting a user password restricts access to status information to only those
who know the user password. The user password can be set or changed from the administrator
user.
• Administrator — Setting an administrator password provides access to the administrator
functions with the RMI or OCP, and restricts access to administrator functions to only those
who know the administrator password. The library initially has a null administrator password,
which until set allows unrestricted access to all administrative functions through the OCP but
not the RMI. Once the administrator password has been set from the OCP, it can be changed
by the administrator user from either the OCP or RMI.
• Security — Setting the security password provides access to configure encryption functions.
The default password is security. The security user has access to all administrator
functionality and can also configure security features and change the security user password.
Configuring the library 65