
HP StoreEver MSL6480 Tape Library User and Service Guide


5. If replacing the base module controller, upgrade the firmware if necessary.
To find the most up-to-date firmware version, visit the http://www.hp.com/support website.
If necessary, download the firmware files.
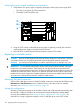
Update the firmware from the RMI Maintenance > Software Upgrades > System Firmware
screen.
6. If replacing the base module controller, verify that the configuration settings are correct. If
necessary restore the settings from a file of saved settings, or re-enter them using the OCP or
RMI.
Update any configuration settings that changed since the settings were saved.
If the library has licensed features, verify that the license information was retained and then
re-enable the features if necessary.
Verify the date, time, and timezone information and reset them if necessary.
If using the MSL Encryption Kit, re-enter the PIN.
7. If the UID LEDs are still illuminated, deactivate them using the OCP or RMI.
8. Resume the host applications.
Powering on the library
Power on the library by pressing the power button on the base module just below the OCP; the
green light will illuminate. When the library is powered on, it inventories the tape cartridges in the
magazines, checks the firmware version on all modules, configures the tape drives, confirms the
presence of the existing modules, and searches for any new modules.
Replacing the chassis fan
CAUTION: Parts can be damaged by electrostatic discharge. Keep parts in electrostatic containers
until needed. Ensure you are properly grounded when touching static sensitive components.
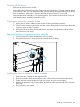
Identifying the failed component
See the OCP or RMI Home screen to identify the failed component. Activate the UID LEDs from the
Maintenance > UID LED Control screen to locate the library in the data center. For detailed
instructions, see “Identifying a failed component” (page 96).
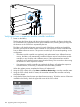
Removing the chassis fan assembly
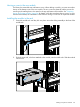
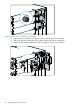
1. Loosen the two blue captive thumbscrews on the chassis fan assembly.
2. Using the thumbscrews, slowly remove the chassis fan assembly from the library.
Replacing the chassis fan 109