
HP StoreEver MSL6480 Tape Library Module Replacement (QU625-96304, June 2013)


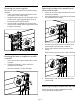
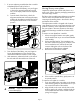

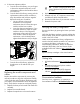
Table Of Contents
- Overview
- Saving the configuration settings
- Unlocking the magazine
- Using the OCP
- Using the manual release
- Removing the tape cartridges
- Powering off the library
- Removing the module cables
- Removing the tape drives
- Removing the power supplies
- Removing the base or expansion module controller
- Removing the chassis fan assembly and drive power boards
- Removing the empty module from the rack
- Moving library cover plates
- Installing the replacement module into the rack
- Replacing the module components and cables
- Verifying the library configuration
- Getting help
- Documentation feedback
Removing the power supplies
Remove both power supplies from the module being
replaced.
1. Loosen the three blue captive thumbscrews with
your fingers on the power supply.
2. Using the thumbscrews (one on each side), slowly
pull the power supply approximately 10 cm (4
inches) from the back of the library.
3. Use one hand to completely remove the power
supply from the module while using the other hand
to support the bottom.
1
2
Removing the base or expansion module
controller
1. Loosen the two blue captive thumbscrews on the
controller.
2. Using the thumbscrews, slowly remove the
controller from the library.
Place the controller in a static safe bag.
1
2
Removing the chassis fan assembly and
drive power boards
1. Loosen the two blue captive thumbscrews on the
chassis fan assembly.
2. Using the thumbscrews, slowly remove the chassis
fan assembly from the library.
1
2
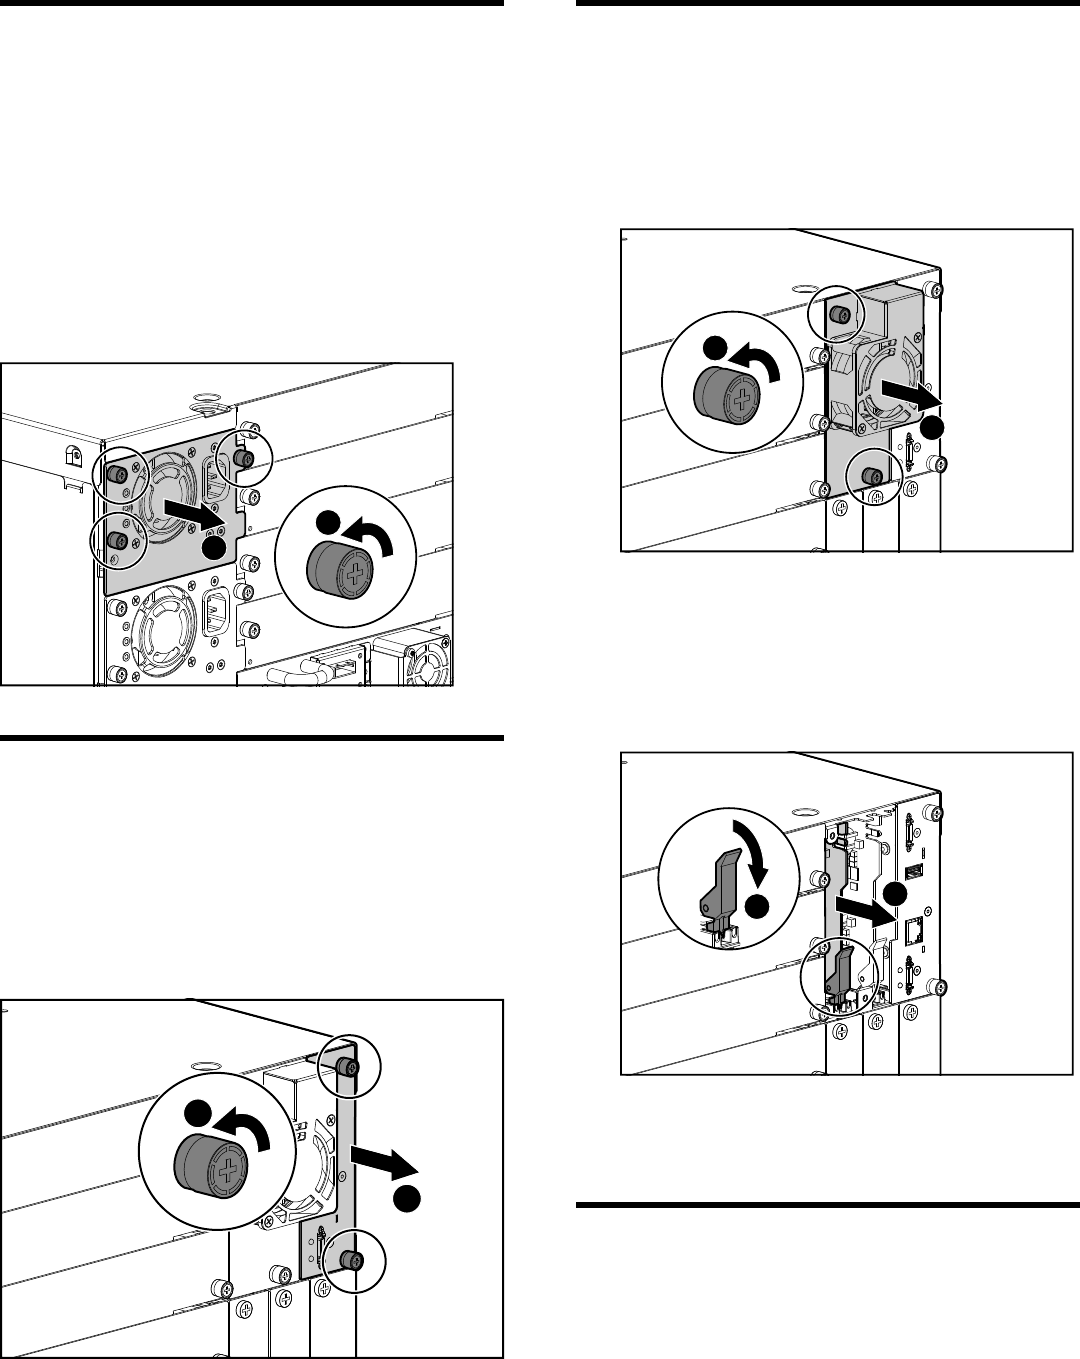
3. Push down the plastic latch on one of the drive
power boards until the board is released.
4. Slowly slide the drive power board out of the
library.
Place the drive power board in a static safe bag.
2
1
5. Repeat steps 3 and 4 to remove the other drive
power board.
Removing the empty module from the rack
Obtain assistance to lift and stabilize the module
during removal and replacement.
Page 4