
HP StorageWorks XP Disk Array Configuration Guide (T5278-96047, May 2011)


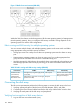
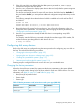

Table Of Contents
- XP Disk Array Configuration Guide
- Contents
- 1 Overview
- 2 HP-UX
- Installation roadmap
- Installing and configuring the disk array
- Installing and configuring the host
- Connecting the disk array
- Configuring disk array devices
- Verifying the device files and drivers
- Creating the device files
- Creating the physical volumes
- Creating new volume groups
- Creating logical volumes
- Creating the file systems
- Setting the I/O timeout parameter
- Creating the mount directories
- Mounting and verifying the file systems
- Setting and verifying the auto-mount parameters
- 3 Windows
- 4 Novell NetWare
- 5 NonStop
- 6 OpenVMS
- 7 VMware
- 8 Linux
- 9 Solaris
- Installation roadmap
- Installing and configuring the disk array
- Installing and configuring the host
- Connecting the disk array
- Configuring disk array devices
- Configuring for use with Veritas Volume Manager 4.x and later
- 10 IBM AIX
- 11 Citrix XenServer Enterprise
- 12 Troubleshooting
- 13 Support and other resources
- A Path worksheet
- B Path worksheet (NonStop)
- C Disk array supported emulations
- D Using Veritas Cluster Server to prevent data corruption
- E Reference information for the HP System Administration Manager (SAM)
- F HP Clustered Gateway deployments
- Glossary
- Index
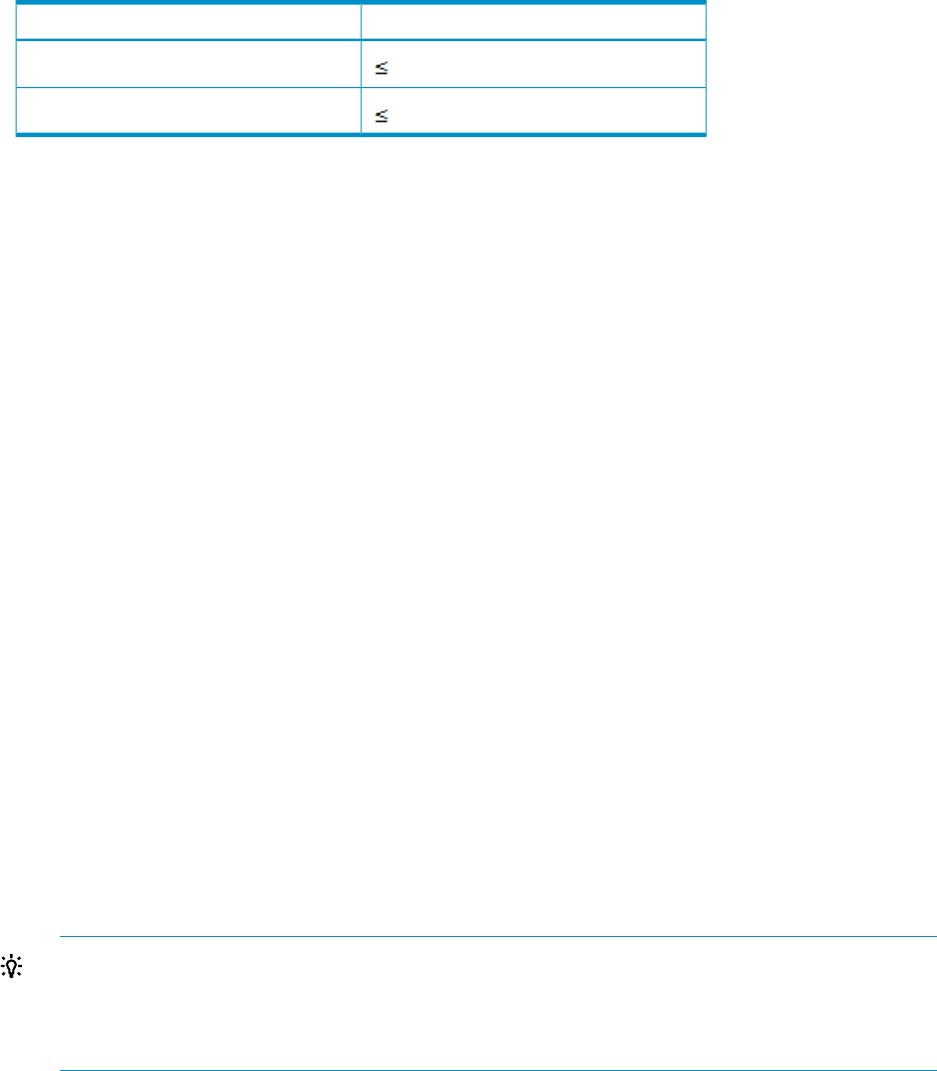
Table 24 Device parameters-queue depth (IBM AIX)
Recommended ValueParameter
32
Queue depth per LU
1024
Queue depth per port (MAXTAGS)
The recommended queue depth settings might not provide the best I/O performance for your
system. You can adjust the queue depth setting to optimize the I/O performance of the disk array.
Displaying the device parameters using the AIX command line
At the command line prompt, enter lsattr -E -l hdiskx, where hdiskx is the device file
name.
Example
# lsattr –E -l hdisk2
Changing the device parameters using the AIX command line
1. To change the R/W timeout parameter, enter:
chdev –1 hdiskx –a rw_timeout='60'
2. To change the queue depth parameter, enter:
chdev –l hdiskx –a queue_depth='x'
where x is a value from the previous table.
3. To change the queue type parameter, enter:
chdev –l hdiskx –a q_type='simple'
For example, enter the following command to change the queue depth for the device hdisk3:
# chdev –l hdisk3 –a queue_depth='2'
4. Verify that the parameters for all devices were successfully changed.
For example, enter the following command to verify the parameter change for the device
hdisk3:
# lsattr –E –l hdisk3
5. Repeat these steps for each OPEN-x device on the disk array.
TIP: The lsattr command also shows useful information, such as LUN ID of the mapped
LDEV, worldwide name of the disk array FC port, and N-Port ID.
Another useful command for determining the slot position and port worldwide name of the
FCA is the lscfg –v –l hdiskx command.
Changing the device parameters using SMIT
1. Start SMIT. (Optional) For an ASCII session, use the smit –C command.
2. Select Devices.
Example
System Management
Move cursor to desired item and press Enter.
Software Installation and Maintenance
Software License Management
Devices
System Storage Management (Physical & Logical Storage)
108 IBM AIX