
HP StorageWorks Virtual Array va 7000 family - Installation Guide


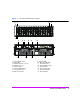
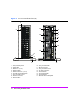
Table Of Contents
- Virtual Array Installation Guide
- Other Information You Will Need
- Operating Environment
- Virtual Array Configurations
- Virtual Array Enclosures
- Hardware Installation
- Configuring the Array Operating Settings
- Step 7. Change the controller default host port behavior
- Step 8. Change the controller port data rate to 2 Gbit/sec
- Step 9. Change the controller port topology
- Step 10. Change the controller loop ID
- Step 11. Change the RAID operating level of the array
- Step 12. Format the array controller enclosure
- Step 13. Power-off the array controller enclosure
- Step 14. Disconnect the RS-232 terminal
- Step 15. Connect fiber optic cables
- Step 16. Power-on all array enclosures
- Installing CommandView SDM Software
- Installing Command View SDM on HP-UX
- Installing Command View SDM on Windows
- Installing Command View SDM on Linux Red Hat
- Final Array Configuration
- Solving Installation Problems
Virtual Array Installation Guide 9
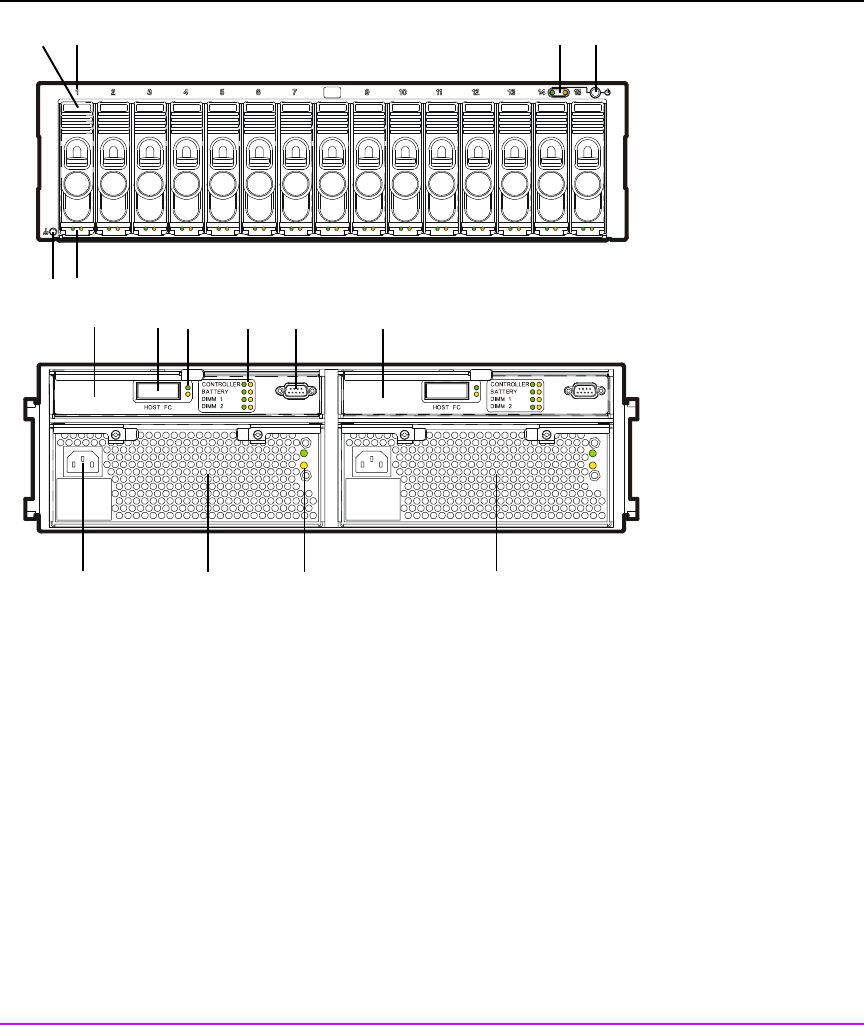
Figure 1 VA 7100 Controller Enclosure (A/AZ)
21
3
4
7
89
10 11
12
16
56
14 13 15
1 - Power/Standby Switch 9 - HOST FC LEDs
2 - System LEDs 10 - Array Controller LEDs
3 - Disk Drive Slot No. 1 (of 15) 11 - RS-232 Connector
4 - Disk Drive 1 (of 15) 12 - Array Controller Card 2
5 - Disk Drive LEDs 13 - Power Module 1
6 - ESD Ground Receptacle 14 - AC Power Connector
7 - Array Controller Card 1 15 - Power Module LEDs
8 - HOST FC Connector 16 - Power Module 2