
HP StorageWorks Virtual Array va 7000 family - Installation Guide
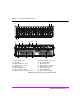
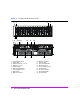
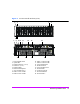
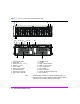
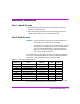
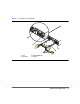
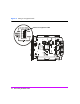

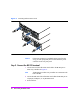
Table Of Contents
- Virtual Array Installation Guide
- Other Information You Will Need
- Operating Environment
- Virtual Array Configurations
- Virtual Array Enclosures
- Hardware Installation
- Configuring the Array Operating Settings
- Step 7. Change the controller default host port behavior
- Step 8. Change the controller port data rate to 2 Gbit/sec
- Step 9. Change the controller port topology
- Step 10. Change the controller loop ID
- Step 11. Change the RAID operating level of the array
- Step 12. Format the array controller enclosure
- Step 13. Power-off the array controller enclosure
- Step 14. Disconnect the RS-232 terminal
- Step 15. Connect fiber optic cables
- Step 16. Power-on all array enclosures
- Installing CommandView SDM Software
- Installing Command View SDM on HP-UX
- Installing Command View SDM on Windows
- Installing Command View SDM on Linux Red Hat
- Final Array Configuration
- Solving Installation Problems
Virtual Array Installation Guide 19
Step 4. Connect the power cords
WARNING To avoid electrical fire hazard, use a branch circuit breaker
properly rated for each power supply. If multiple enclosures are
connected to a single branch circuit, multiply the number of
enclosures times the maximum current, then select a circuit
breaker with at least a 20% higher current rating. See Table 2.
To optimize system availability, each power supply should be
connected to a separate power bus. All wiring should meet or
exceed local electrical wiring codes.
The product power cords are used as main disconnect devices.
To ensure that the power cords can be disconnected quickly,
locate the product near an easily accessible power outlet.
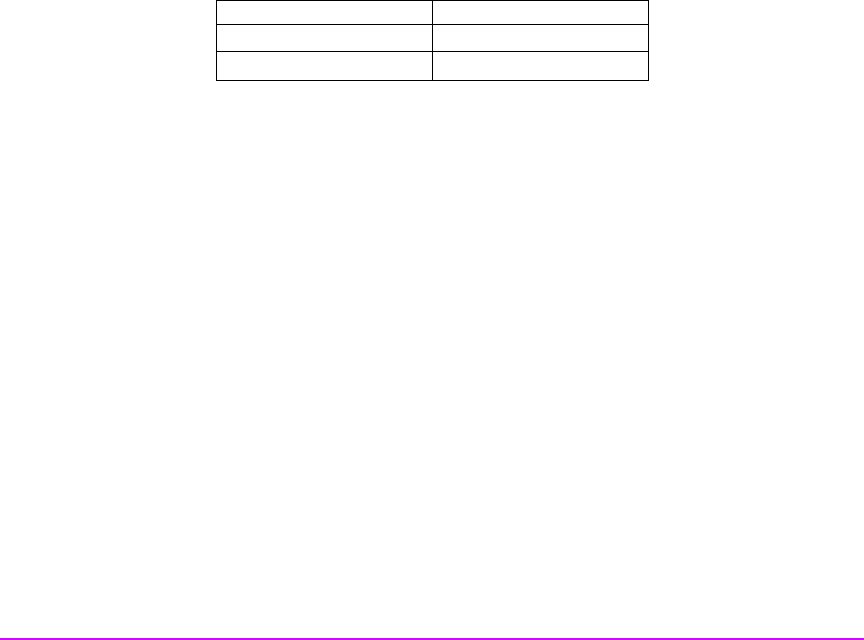
Table 2 Enclosure Electrical Specifications
1 Connect the male ends of the power cords to one of the following ac power
outlets:
— Separate ac circuits.
— Separate uninterruptible power supplies (UPSs).
— For racked enclosures, separate power distribution units (PDUs).
2 Connect the female ends of the power cords to the ac power connectors on
controller enclosures and disk enclosures. See Figure 9.
Note Make sure that the locations of power cables do not interfere
with the removal of field replaceable units.
Controller Enclosure Disk Enclosure
685 Volt-Amps 500 Volt-Amps
2288 BTU/Hour 1611 BTU/Hour