HP StorageWorks Virtual Array 7000 Family User and Service Guide (January 2005)
Table Of Contents
- Warranty Information
- Product Overview
- System Configurations
- Lowest Entry Point, Non-HA Minimum Configuration (VA 7100 only)
- Lowest Entry Point, Non-HA Minimum Configuration (VA 7410)
- Entry Level Non-Cluster With Path Redundancy (All VA arrays)
- Entry Level Cluster with Path Redundancy High Availability (VA 7410)
- Midrange Non-Cluster (All VA arrays)
- Midrange Non-Cluster (VA 7410)
- Midrange Non-Cluster with Full Storage Path Redundancy (All VA Arrays)
- Typical Non-Clustered with Path Redundancy (VA 7410)
- Typical Clustered Configuration (All VA models)
- Typical Clustered Configuration (VA 7410)
- HP-UX MC Service Guard or Windows 2000 Cluster (All VA arrays)
- Highly Redundant Cluster (VA 7410)
- Typical Highly Redundant Cluster (All VA models)
- Typical Highly Redundant Cluster (VA 7410)
- Troubleshooting
- Servicing & Upgrading
- Specifications & Regulatory Statements

118 Servicing & Upgrading
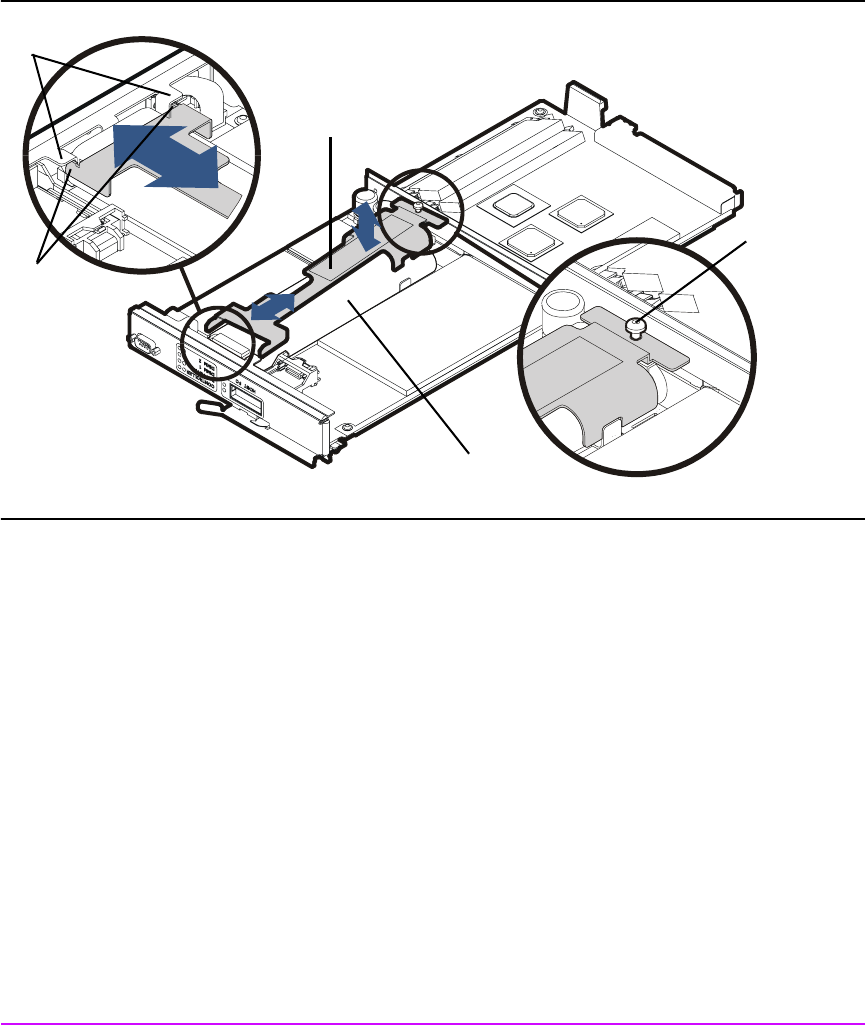
Figure 46 Removing & Installing an Array Controller Battery
Installing an Array Controller Battery
1 Seat the battery connector (Figure 47, 1) on the battery terminal (2).
2 Lay the battery (Figure 47, 3) on the foam pad (4) and in the battery
bracket (5).
3 Place the battery clamp (Figure 46, 2) on the battery (3).
4 Slide the battery clamp forward so that the front tabs (Figure 46, 4) are
positioned under the bulkhead tabs (5).
5 Tighten the battery clamp screw (Figure 46, 1) with a T-20 driver.
6 Replace the array controller card. See "Installing an Array Controller" on
page 110.
Note If the array controller battery was replaced on a single array
controller, wait for the battery to charge before resuming I/Os.
5
4
2
3
1


