Console user’s guide Part number: T2558-96330 First edition: March 2009
© Copyright 2009 Hewlett-Packard Development Company, L.P. Hewlett-Packard Company makes no warranty of any kind with regard to this material, including, but not limited to, the implied warranties of merchantability and fitness for a particular purpose. Hewlett-Packard shall not be liable for errors contained herein or for incidental or consequential damages in connection with the furnishing, performance, or use of this material.
Table of Contents Chapter 1 Introduction .........................................................1-1 Resources ......................................................................................... 1-1 Chapter 2 Installing Console .................................................2-1 Requirements ................................................................................... 2-1 Protecting a server using Virtual Recovery Assistant for Hyper-V .................................
Setting protection options ................................................................ 5-7 Virtual hard disks ............................................................................. 5-9 Performing failover ........................................................................... 5-9 Undoing failover ............................................................................... 5-9 Reversing failover ...........................................................................
Introduction Storage Mirroring Console allows you to manage all aspects of the process of protecting your servers with Storage Mirroring. With Storage Mirroring Console, you can: Configure protection for an entire physical or virtual source server with a Microsoft® Hyper-V™ target server using the Virtual Recovery Assistant. Configure protection for virtual machines running on the Microsoft Hyper-V platform using Storage Mirroring for Hyper-V.
Installing Console Review the minimum requirements. When your servers meet the required conditions, continue with the installation instructions. For additional information about system requirements for Storage Mirroring source and target servers, see the Storage Mirroring User’s Guide.
Protecting a server using Storage Mirroring for Hyper-V Storage Mirroring for Hyper-V requires the following minimum system configuration: Source server—The source server must be running Microsoft Windows Server 2008 Standard, Datacenter, or Enterprise, 64-bit version, with the Hyper-V service installed NOTE: There is no limit on the number of virtual machines that can be protected when using the Datacenter version of Storage Mirroring for Hyper-V.
Navigating the Storage Mirroring Console This section provides information about how to use the Storage Mirroring Console. Starting Storage Mirroring Console After Storage Mirroring Console is installed, you can start it by selecting Start, Programs, HP, HP StorageWorks Storage Mirroring Console. The Storage Mirroring Console will appear. Getting help Additional information about tasks in the Storage Mirroring Console interface is available in the online help. To launch the online help: 1.
Working in the Storage Mirroring Console The console provides an overview of the connection status for your servers, with a special emphasis on servers that may need attention. The Home page provides an at-a-glance overview of the status of your connections as well as controls for managing your connections. From the Home page, you can: Launch tasks—Click the links in the Tasks area on the right.
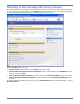
Changing default Storage Mirroring Console options On the Options page, you can configure general settings for Storage Mirroring Console. To view the Options page, either click the Options button on the main toolbar, or select Tools, Options. Enter the following information. 1. In the Monitoring interval field, enter the interval (in number of seconds) at which you want Storage Mirroring to poll the servers for updated information. 2.
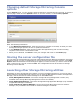
You can also add other frequently-accessed application to the Tools menu. 1. To modify the list of utilities available from the Tools menu, select Tools, External Tools. The External Tools window will appear. 2. Click the New button to add a new tool. Or, select a tool in the Tools area to edit settings for an existing tool. 3. In the Name field, enter the name you want to use to identify the application or tool. 4. In the Command field, type the location of the .
Virtual Recovery Assistant: Protecting a Server with a Hyper-V Virtual Machine Storage Mirroring can be used to protect entire physical or virtual machines with Microsoft Hyper-V virtual machines. Storage Mirroring uses Virtual Recovery Assistant technology to automatically provision the virtual machines for you on the target Hyper-V host, greatly simplifying the protection process. The Storage Mirroring clients are used to create protection jobs.
Starting the protection workflow From the Home screen, click the Get Started button. You will be taken to the Get Started screen. NOTE: Depending on which Storage Mirroring components you have installed, you may see additional tasks on this screen. To begin setting up protection for a server with a Hyper-V virtual machine, select Protect a server to a Hyper-V virtual machine, then click Next.
Enter the following information for the source server: 1. Server—Enter or select the DNS name or IP address of the physical or virtual source server that you want to protect. Or, click the Browse button to locate a server. a. In the Browse for Server window, browse through the server tree to locate a source server. b. After you have found the source server, select it, then click OK. NOTE: In order to protect a source, the source must have no more than four NICs enabled.
Selecting volumes to protect Select the volumes you want to protect with the target virtual machine. By default, the system volume will be selected. You can specify the size of the selected volume on the replica virtual machine. 1. Select the checkbox next to the volume(s) to protect in the Volume table. 2. In the Storage Controller column, select the type of storage controller for the volume (IDE or SCSI). NOTE: A maximum of three volumes can be attached to an IDE controller.
4. To enable the SCSI controller, mouse, and other services on the replica virtual machine, select Install Hyper-V integration components on the source server. NOTE: This option will only install components on servers running Windows 2008. If your source is running Windows 2003, you will need to manually install integration components on the virtual machine after failover is complete.
Enter the following information for the target server: 1. Server—Enter or select the IP address or DNS name of the target server that will host the virtual replica machines. Or, click the Browse button to locate a server. a. In the Browse for server window, browse through the file tree to locate a target server. b. After you have found the target server, select it, then click OK.
Selecting the target volume Select the volume where you would like the replica virtual machine to be stored. The target volume must have enough free space to store the source data. By default, the replica virtual machine will be created in the HVRA_Replicas\ folder. If you want to change the replica virtual machine path, enter it in the field. The chosen directory will be created on the root level of the selected volume.
Configuring the replica virtual machine Select the options that will configure the virtual machine that will stand in for the source server after failover. 1. Replica virtual machine display name—Use the default replica virtual machine name, or enter a new name. 2. Number of processors—Select the number of processors for the replica virtual machine. NOTE: The Processors on the source server field displays the number of processors on the original source server. 3.
Setting protection options Configure the parameters for the protection job. 1. Compression—Select the compression level (None, Low, Medium, or High) to use when sending data from the source to target server. 2. Send data to this target route—Select the IP v4 or IP v6 address on the target server to which you want to send data from the source. 3. Limit Bandwidth—You can specify a limit for the bandwidth to be used by source-to-target communications for this protection job.
8. When you have finished setting protection options, click Next. The Protection Summary window will appear. 9. (Optional) If you want to change the name of the protection, click the Change button. The Change Name window will appear. Enter a new name for the protection, then click Save. 10. Review the protection options, then click Finish to initiate the protection process. After you click Finish, Storage Mirroring creates the job. The Monitor Connections page will appear.
Failing over to the replica virtual machine Storage Mirroring Console provides the ability to failover to a replica virtual machine in the event of a failure of the source machine. Source servers may be failed over in two different ways: Automatic Failover—The application detects that a failover condition is met and automatically initiates the failover process. Manual Failover—The user manually initiates the failover process by clicking the Failover button in the user interface.
Storage Mirroring for Hyper-V: Protecting a Hyper-V Virtual Machine With Storage Mirroring for Hyper-V, you can use the Storage Mirroring Console to protect virtual machines running on the Microsoft Hyper-V platform. Storage Mirroring replicates all of the files associated with the virtual machine for one Microsoft Hyper-V host to another. Storage Mirroring for Hyper-V can be used to: Automate the discovery and protection of virtual machines.
Many to Many—The Storage Mirroring Console can manage multiple Hyper-V source and target hosts, allowing you to protect virtual machines from multiple Hyper-V hosts on multiple Hyper-V targets. The following host protection configuration is not supported by Storage Mirroring for Hyper-V.
Selecting the source machine When you click Protect a Hyper-V virtual machine, the Choose Source Server window will appear. Enter the following information for the source server: 1. Server—Enter the name or IP address of the Hyper-V server that hosts the virtual machine that you want to protect. Or, click the Browse button to locate a server. a. In the Browse for Server window, browse through the server tree to locate a source Hyper-V host server. b.
3. Password—Enter the password that is associated with the user account. 4. Storage Mirroring Port—If you have changed the default port (6320) used by the Storage Mirroring server, specify the port. 5. After all fields have been completed, click Next. A window will display the progress as the source server is authenticated. Selecting a virtual machine The virtual machines that are found on the source server will be added to the list on the Choose Virtual Machine window.
Selecting a target server Select the target Hyper-V server where the replica virtual machine will be stored. Enter the following information for the target server: 1. Server—Enter the IP address or DNS name of the Hyper-V server that will be the target host. Or, click the Browse button to browse to locate a server. a. In the Browse for server window, browse through the file tree to select a target server. b. After you have found the target server, select it, then click OK. 2.
Selecting the target volume Select the volume on the Hyper-V target where you would like the replica virtual machine to be stored. All of the source virtual hard disk (VHD) files will be created on the same target volume. By default, the replica virtual machine will be created in the DTHV_Replicas\\ folder. If you want to change the replica virtual machine path, enter it in the field.
2. Map source virtual switches to target virtual switches—If there are multiple target networks, you can select the network on the target to use. 3. When you are finished configuring the replica virtual machine, click Next. NOTE: Storage Mirroring will not update the virtual machine network settings on failover. Setting protection options Configure the parameters for the protection job.
4. When you have finished setting protection options, click Next. The Protection Summary window will appear. 5. (Optional) If you want to change the name of the protection, click the Change button. The Change Name window will appear. Enter a new name for the protection, then click Save. 6. Review the protection options, then click Finish to initiate the protection process. When you click Finish, a message box will appear identifying the status of the protection check.
Virtual hard disks Storage Mirroring for Hyper-V monitors the virtual disks of a protected virtual machine for changes to the disk layout. If a virtual hard disk (VHD) is added to the virtual machine, Storage Mirroring for Hyper-V will update the protection job to include the new VHD. This will start a file difference mirror. If a VHD is removed from a protected VM, Storage Mirroring for Hyper-V will correctly update the configuration of the replica VM to include the new disk layout.
Reversing failover After a live failover has been performed, you can reverse the protection. This allows you to replicate target data back to the source. Select a protection that has already failed over, then click the Reverse protection button to start the protection in the reverse direction. The job will start synchronization in the reverse direction. The job name and the log file name will change accordingly.
Monitoring Protection Jobs The Storage Mirroring Console provides an interface for monitoring and managing the status of connections for each server that has been added to the Storage Mirroring Console. Monitoring connections Click the Monitor Connections button on the main toolbar. Select Go, Monitor Connections. Click View All Connections in the Connection Summary area of the Home page. On this page, you can monitor and manage your protection jobs.
Viewing connection summary information Each connection is displayed on the Monitor Connections page. Connection Information—The table at the top of the Monitor Connections page displays summary information about connections. See the Connection Information table for a description of what is displayed for each connection. Connection Filters—You can filter the connections shown using the toolbar buttons. See the table Connection Filter Controls for a description of the filter controls.
Connection Detail Replication Status Transmit Mode Description Replicating—Data is being replicated from the source to the target. Pending—Replication is pending. Stopped—Replication has been stopped. Out of Memory—Replication memory has been exhausted. Unknown—Cannot determine the replication status. Active—Data is being transmitted from the source to the target. Paused—Data transmission has been paused. Scheduled—Data transmission is waiting on schedule criteria.
Virtual Recovery Assistant Connection Details Controls Toolbar Button Description Configure—Select a protection, then click the Configure button to open the protection summary for the selected protection. Click the Change button next to setting you want to modify. For more information about changing protection settings, see Setting protection options on page 4-9. Delete—Select a protection, then click the Delete button to remove configuration information for the selected protection.
Storage Mirroring for Hyper-V Connection Details Controls Toolbar Button Description Configure Protection—Select a protection, then click the Configure Protection button to open the protection summary for the selected protection. Click the Change button next to setting you want to modify. For more information about changing protection settings, see Setting protection options on page 5-7.
Toolbar Button Description Reverse protection—Select a protection that has already failed over, then click the Reverse protection button to start the protection in the reverse direction. The job will start synchronization in the reverse direction. The job name and the log file name will change accordingly.
3. Click the View Connection Details button. The View Connection Details page will appear. Connection Properties Statistic Description Health Description A short description of the connection status. The connection is in a healthy state. The connection is in a warning state. The connection is in an error state. The connection is in an unknown state. Activity What Storage Mirroring is currently doing on the server. Replication Set The name of the replication set.
Statistic Transmit Mode Target data state Description Active—Data is being transmitted from the source to the target. Paused—Data transmission has been paused. Scheduled—Data transmission is waiting on schedule criteria. Error—There is a transmission error. Unknown—Cannot determine the transmission status. OK—The data on the target is in a good state. Mirroring—The target is in the middle of a mirror process. The data will not be in a good state until the mirror is complete.
Statistic Replication Status Description Replicating—Data is being replicated from the source to the target. Pending—Replication is pending. Stopped—Replication has been stopped. Out of Memory—Replication memory has been exhausted. Unknown—Cannot determine the replication status. Replication Queue The total number of replication bytes that are in the source queue. Disk Queue The number of bytes of disk space being used to queue data on the source.
Monitoring Storage Mirroring Servers After you specify servers in your environment, Storage Mirroring Console monitors the Storage Mirroring connections on those servers. Storage Mirroring Console provides easy, at-a-glance monitoring of the connections, including statistics and status information. The intent of the Storage Mirroring Console is to monitor Storage Mirroring source servers. The Storage Mirroring Console will collect target server information based on the source server that is being monitored.
Adding servers manually 1. To add servers, from the Home page, click the Add servers option under Tasks on the right pane. 2. Specify server information. Server—Enter the name of the server to add to Storage Mirroring Console. NOTE: You should only add Storage Mirroring source servers. Any other servers will show up in an error state. User name—Enter the account that you want to use to access the specified server. Password—Enter the password associated with the specified User name.
8. After you have added all your servers to the Servers to be added list, click OK to commit your changes. The Manage Servers page will appear. 9. Continue with the section Managing servers on page 7-3. Importing servers You can import a list of servers and credentials from an .xml file created by Storage Mirroring Console or the Storage Mirroring Management Console. 1. Click File, Import, or click the Import Servers from a file link in the Tasks area on the Home page. The Import window will appear. 2.
Server Information Description Version The Storage Mirroring version running on the server. Activation Code Storage Mirroring activation code for the server. Server Controls Toolbar Button Description Add Servers—To add a new server, click the Add Servers button. The Add Servers page will appear, as described in Adding servers on page 7-1. View Server Details—To view more information about the selected server, click the View Server Details button.
From the View Server Details page, click the Provide credentials link in the Tasks area. 1. Specify the credentials. User name—Enter the account that you want to use to access the specified server. Password—Enter the password associated with the specified User name. Domain—(Optional) If you are providing credentials for a domain account (for example, CORPORATE\administrator), enter the domain associated with the specified User name. 2. Click OK.
3. Click the View Server Details button, or right-click and select View Server Details. The View Server Details page will appear. 4. The following table describes the information displayed on the View Server Details page. Server Details Server Information Description Server Name or IP address of the server. Status State of the client communication to the server. Activity Connection pending—A connection has been configured but has not yet been established.
Server Information Description Access Storage Mirroring security role for the provided credentials. User name The account used to access the server. Source connections Double-click on a connection in the Source connections list to view details of that connection. Target connections Double-click on a connection in the Target connections list to view details of that connection. 5. Click Provide Credentials in the Tasks area to update the credentials for the server.
Server Event Details—The top pane displays a summary of each Storage Mirroring event. The bottom pane provides an expanded description of the event. See the table Event Information for a description of what information is displayed for each connection. Event Filters—You can filter the events shown for a server using the toolbar buttons. See the table Event Filter Controls for a description of the filter controls.
Using Firewalls If your source and target are on opposite sides of a NAT or firewall, you will need to configure your hardware to accommodate Storage Mirroring communications. You must have the hardware already in place and know how to configure the hardware ports. If you do not, see the reference manual for your hardware. In a NAT or firewall environment, you must have a static mapping where a single, internal IP address is always mapped in a one-to-one correlation to a single, external IP address.