
HP StorageWorks Scalable File Share System Installation and Upgrade Guide Version 2.2


Using the keyboard, video, and mouse switchA–4
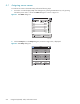
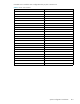
Figure A-5 KVM Names dialog box with new server name
7. Repeat Steps 4 through 6 to change the names of other servers.
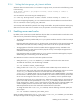
A.2 Selecting a server
When you select a new server, the console switch reconfigures the KVM to the setting for the newly selected
server. You can select a new server in multiple ways, as follows:
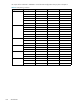
• On the Main dialog box (Figure A-1), double-click the server name, EID, or port number.
• If the display order of the server list is by port (that is, the Port button on the Main dialog box is
selected), enter the port number of the server to be selected and press the Enter key.
• If the display order of the server list is by name or EID number (that is, the Name or EID button on the
Main dialog box is selected), enter enough letters of the server name or EID number to be unique,
and then press the Enter key.
• Press the Print Scrn key, then enter enough letters of the server name or EID number to be unique.
NOTE: If you have set a screen delay time and you press the key sequence before that time
delay has expired, the on-screen display is disabled. Refer to the HP KVM Server Console Switch
User Guide for more information about setting the on-screen display.
• To select the previous server, press the Print Scrn key, then press the Backspace key. The key
sequence toggles between the previous and current connections (if no other key strokes have been
entered).
To disconnect the KVM from a server, press the Print Scrn key, then press the Alt+0 keys.
Names
?
Port Type
Modify
OK
south1
south2
Svr-3
Svr-4
Svr-5
Svr-6
Svr-7
Svr-8
01
02
03
04
05
06
07
08
HPTC-0056
Srvr
Srvr
Srvr
Srvr
Srvr
Srvr
Srvr
Srvr
Toggle Name/EID