
HP StorageWorks Scalable File Share System Installation and Upgrade Guide Version 2.2


Assigning server names A–3
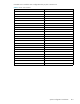
3. In the Setup dialog box, click the Names button. The Names dialog box, as shown in Figure A-3, is
displayed.
Figure A-3 KVM Names dialog box
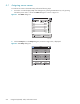
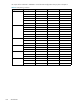
4. In the Names dialog box, use the up or down arrow key to select the server name or port number to
be changed. Click the Modify button to display the Name Modify dialog box, as shown in
Figure A-4.
Figure A-4 KVM Name Modify dialog box
5. Enter a name in the New Name field. The name can be from 1 to 15 characters in length. The
characters are case sensitive and can consist of A-Z, 0-9, spaces, and hyphens. Click the OK button
to transfer the name to the Names dialog box.
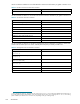
6. In the Names dialog box, click the OK button. Figure A-5 shows the Names dialog box after the
name of the port 2 connection has been changed to south2.
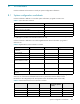
Names
?
Port Type
Modify
OK
south1
Svr-2
Svr-3
Svr-4
Svr-5
Svr-6
Svr-7
Svr-8
01
02
03
04
05
06
07
08
HPTC-0054
Srvr
Srvr
Srvr
Srvr
Srvr
Srvr
Srvr
Srvr
Toggle Name/EID
Name Modify
?
OK
HPTC-0055
Original Name:
New Name:
Svr-2
south2