
HP StorageWorks Scalable File Share System Installation and Upgrade Guide Version 2.2


Step 12: Installing and configuring the MDS server 7–27
7.12.2 Verifying the installation of the MDS server
To verify the installation of the MDS server, perform the following steps:
1. Connect to the console of the MDS server and log in as the root user.
2. Run the following tests:
a. Verify that the site network is operating correctly, by ensuring that you can ping other hosts on
the site network from the MDS server, and that you can ping the MDS server from hosts on the
site network.
b. Verify that the date on the MDS server, as served by the NTP server specified earlier, is correct.
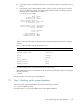
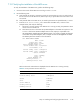
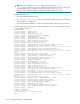
c. Enter the show server server_name command for the MDS server, as shown in the
example below, and verify the following:
i. The server is running correctly. If the MDS server is running correctly, the parameter values
will be as shown in Table 7-2.
ii. The firmware version on the Smart Array 6404 adapters on the MDS server (shown in the
Firmware field in the Host Bus Adapters section of the output) is as specified in the
HP StorageWorks Scalable File Share Release Notes. If you need to upgrade the firmware
on the Smart Array 6404 adapters, refer to Chapter 8 of the HP StorageWorks Scalable
File Share System User Guide for more information.
sfs> show server south2
Name: south2
Primary Role: mds
Backup Server: south1
Server Firmware Model: 29
Server Firmware Date: 05/01/2004
iLO Firmware: 1.82
Current Config. State: Configured
Desired Config. State: Configured
Status: Finished
State: running
Power: on
Server Enabled: yes
Primary Services:
Running Services: none
.
.
.
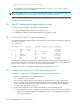
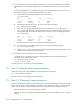
Table 7-2 shows the values that are displayed when the MDS server is running correctly.
Table 7-2 Correct parameter values for MDS server
Parameter Value
Current Config. State Configured
Desired Config. State Configured
Status Finished
State running
Server Enabled yes
Primary Services Blank
Running Services none