
HP StorageWorks Scalable File Share Release Notes - Version 2.2-1


New and changed features in HP SFS Version 2.2-11–14
1.7 Documentation updates and corrections
This section provides updates for new features and corrections for errors in the HP SFS Version 2.2-0
documentation.
1. 7.1 HP StorageWorks Scalable File Share Client Installation and User Guide
This section contains the following affected sections:
• Section 2.3.1 Step 1: Upgrading the HP SFS client software
• Section 2.4 Downgrading HP SFS client software on HP XC systems
• Section 4.10.2 Examples of communications messages/Section 7.3.5 Access to a file hangs
(ldlm_namespace_cleanup() messages)
1.7.1.1 Section 2.3.1 Step 1: U pgra din g t he H P S FS cl ient s o f t ware
To upgrade the HP SFS client software on an HP XC head node, perform the following steps:
1. If you are using XC Availability you must disable it before proceeding. If your XC system is Version 3.1
or higher and has availability enabled, run the transfer_from_avail command to disable
availability before stopping the SFS service and stopping any services in /hptc_cluster. For
details on how to use this command see the HP XC System Software Administration Guide.
2. On the node that you are going to upgrade, stop all jobs that are using Lustre file systems.
If your system is an XC system and mounts /hptc_cluster over SFS then run this command to
determine what processes on the head node are using a Lustre file system:
# fuser -vm /hptc_cluster
Then stop the following services:
service nagios stop
service cmfd stop
service syslog-ng stop
service lsf stop
service slurm stop
service mysqld stop
NOTE: You currently cannot run service sfs stop when transfer_to_avail has been
run. This will be fixed in later versions of XC. For the moment you need to run sfsumount -a
as detailed below.
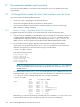
On systems that do not mount /hptc_cluster over SFS enter the fuser command as shown in the
following example, where /data is the mount point of the file system. You must enter the command as
root user; if you run the command as any other user, no output is displayed:
# fuser -vm /data
USER PID ACCESS COMMAND
/data root 303 ..c.. su
user2 10993 ..c.. csh
user2 16408 ..c.. ssh
user3 22513 ..c.. csh
user3 31820 ..c.. res
user3 31847 ..c.. 1105102082.1160
user3 31850 ..c.. 1105102082.1160
user3 31950 ..c.. mpirun
user3 31951 ..c.. srun
user1 32572 ..c.. bash
Alternatively, you can enter the following command (enter the command as root user; if you run the
command as any other user, the command only reports the current user’s references):