
HP StorageWorks 1000 Modular Smart Array application note: Migrating to active/active controllers in OpenVMS environments (434885-001, October 2006)


Migrating to active/active controllers in OpenVMS environments 9
Installing new MSA1500 controllers active/active (system disk/device)
Upgrading existing dual MSA1500 controllers to active/active
Follow the steps in the “For existing OpenVMS installations” section of the MSA1000/1500 Firmware
Updating Guide.
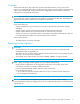
Step Description Check
1
Install both MSA array controllers using instructions shipped with the controllers.
NOTE: Ensure that both controllers have the same cache size installed.
The message, MSA STARTUP COMPLETE displays on each controller LCD panel when
the controllers boot.
F
2
At the MSA CLI, add connections as required for server HBAs, ensuring that the profile
is set to OpenVMS.
Add connections syntax:
add connection <ConnectionName> <wwpn=xxxxxxxx-xxxxxxxx>
[profile=profile_name] [offset=offset_value]
NOTE: The WWPNs used in specifying the new connections are those of the server
HBAs recorded in step 6, page 6 of ”Preparing for the migration”.
Example command:
CLI> add connection MSA-1 wwpn=12345678-12345678
profile=OpenVMS
Example response:
Connection MSA-1 has been added successfully.
Profile OpenVMS is set for the new connection.
See the MSA1000/1500 Command Line Interface User Guide for detailed information
on adding connections.
NOTE: At least one LUN must be created and presented, for OpenVMS to be
installed to, before initiating the OpenVMS install procedure and subsequent firmware
update. OpenVMS must be installed in order to be able to access and execute the
firmware update utility.
F
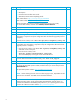
3
Follow the steps in the “For new OpenVMS installations” section of the
MSA1000/1500 Firmware Updating Guide.
F