
HP StorageWorks ESL E-Series e2400-FC 4G Interface Controller Replacement Instructions (December 2005)


2
1
3
4
21
3
4
HP
StorageWorks
ESL E-Series
e2400-FC 4G
interface
controller
replacement
Caution: Parts can be damaged by
electrostatic discharge. Keep parts in their
containers until needed. Ensure you are
properly grounded when touching static-
sensitive components.
Note: This part is not hot-pluggable.
It is necessary to power down the library
to replace this part.
3
1
Open the back door of the library.
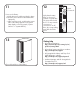
Inspect the contents of the kit.
ACT/
LNK
ACT/
LNK
PORT 1 PORT 0 ETHERNET
SERIAL
PWR
FIBRE
CHANNEL
FIBRE
CHANNEL
ACT/
LNK
PORT 2
FIBRE
CHANNEL
ACT/
LNK
ACT/
LNK
PORT 1 PORT 3
FIBRE
CHANNEL
FIBRE
CHANNEL
ACT/
LNK
PORT 2
FIBRE
CHANNEL
ACT/
LNK
ACT/
LNK
PORT 1 PORT 0 ETHERNET
SERIAL
PWR
FIBRE
CHANNEL
FIBRE
CHANNEL
ACT/
LNK
PORT 2
FIBRE
CHANNEL
ACT/
LNK
ACT/
LNK
PORT 1 PORT 3
FIBRE
CHANNEL
FIBRE
CHANNEL
ACT/
LNK
PORT 2
FIBRE
CHANNEL
ACT/
LNK
ACT/
LNK
PORT 1 PORT 0 ETHERNET
SERIAL
PWR
FIBRE
CHANNEL
FIBRE
CHANNEL
ACT/
LNK
PORT 2
FIBRE
CHANNEL
ACT/
LNK
ACT/
LNK
PORT 1 PORT 3
FIBRE
CHANNEL
FIBRE
CHANNEL
ACT/
LNK
PORT 2
FIBRE
CHANNEL
ACT/
LNK
ACT/
LNK
PORT 1 PORT 0 ETHERNET
SERIAL
PWR
FIBRE
CHANNEL
FIBRE
CHANNEL
ACT/
LNK
PORT 2
FIBRE
CHANNEL
ACT/
LNK
ACT/
LNK
PORT 1 PORT 3
FIBRE
CHANNEL
FIBRE
CHANNEL
ACT/
LNK
PORT 2
FIBRE
CHANNEL
ACT/
LNK
ACT/
LNK
PORT 1 PORT 0 ETHERNET
SERIAL
PWR
FIBRE
CHANNEL
FIBRE
CHANNEL
ACT/
LNK
PORT 2
FIBRE
CHANNEL
ACT/
LNK
ACT/
LNK
PORT 1 PORT 3
FIBRE
CHANNEL
FIBRE
CHANNEL
ACT/
LNK
PORT 2
FIBRE
CHANNEL
ACT/
LNK
ACT/
LNK
PORT 1 PORT 0 ETHERNET
SERIAL
PWR
FIBRE
CHANNEL
FIBRE
CHANNEL
ACT/
LNK
PORT 2
FIBRE
CHANNEL
ACT/
LNK
ACT/
LNK
PORT 1 PORT 3
FIBRE
CHANNEL
FIBRE
CHANNEL
ACT/
LNK
PORT 2
FIBRE
CHANNEL
ACT/
LNK
ACT/
LNK
PORT 1 PORT 0 ETHERNET
SERIAL
PWR
FIBRE
CHANNEL
FIBRE
CHANNEL
ACT/
LNK
PORT 2
FIBRE
CHANNEL
ACT/
LNK
ACT/
LNK
PORT 1 PORT 3
FIBRE
CHANNEL
FIBRE
CHANNEL
ACT/
LNK
PORT 2
FIBRE
CHANNEL
2
4
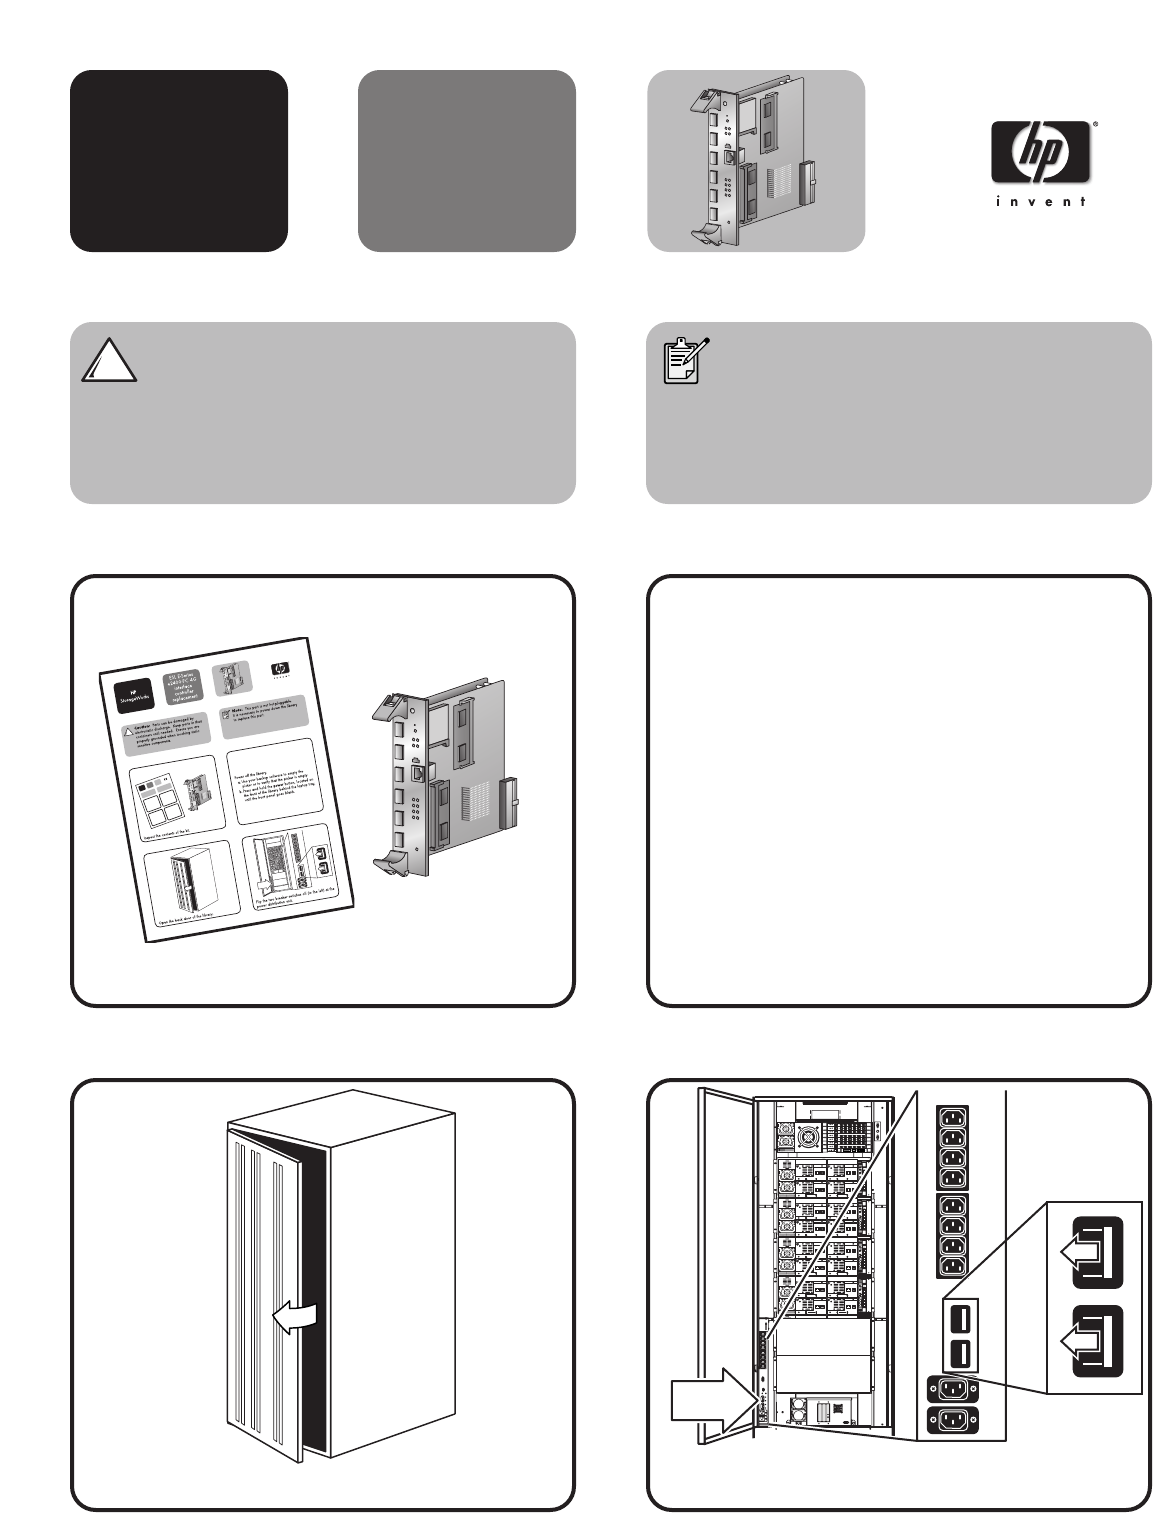
Flip the two breaker switches off (to the left) at the
power distribution unit.
Power off the library.
a. Use your backup software to empty the
picker or to verify that the picker is empty.
b. Press and hold the power button, located on
the front of the library behind the laptop tray,
until the front panel goes blank.