
Data Replication manager with Compaq Tru64 UNIX Logical Storage Manager

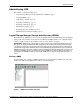
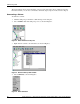
Table Of Contents
- Application Notes – Data Replication Manager with HP Tru64 UNIX Logical Storage Manager
- Application Notes Contents
- HP StorageWorks Technical Support
- Introduction
- DRM Configuration Variations
- Administering LSM
- Augmented Failover, Failback, and Role Reversal Procedures
- All Procedures Description
- Augmented Procedures with Scripts
- Chapter 6: Unplanned Site Failover with Full Failback Procedure
- Chapter 7: Resumption of Operations After Unplanned Loss of Target Site Procedure (Failsafe Mode)
- Chapter 8: Resumption of Operations After Unplanned Loss of Target Site Procedure (Normal Mode)
- Chapter 9: Short Planned Site Failover with Fast Failback Procedure
- Chapter 10: Extended Planned Site Failover With Full Failback Procedure
- Chapter 11: Resumption of Replication After Extended Planned Loss of Target Procedure (Failsafe M...
- Chapter 12: Unplanned Site Failover With Failback To New Hardware Procedure
- Chapter 13: Planned Site Role Reversal Procedure
- Augmented Procedures with Command Line Interpreter
- Chapter 2: Unplanned Site Failover with Full Failback Procedure
- Chapter 3: Resumption of Operations After Unplanned Loss of Target Site Procedure (Failsafe Mode)
- Chapter 4: Resumption of Operations After Unplanned Loss of Target Site Procedure (Normal Mode)
- Chapter 5: Short Planned Site Failover with Fast Failback Procedure
- Chapter 6: Resumption of Replication After Short Planned Loss of Target Procedure
- Chapter 7: Extended Planned Site Failover With Full Failback Procedure
- Chapter 8: Resumption of Replication After Extended Planned Loss of Target Procedure (Failsafe Mode)
- Chapter 9: Unplanned Site Failover With Failback To New Hardware Procedure
- Chapter 10: Planned Site Role Reversal Procedure
- Chapter 11: Disaster Recovery After Role Reversal Procedure
Administering LSM
10 Application Notes – Data Replication Manager with HP Tru64 UNIX Logical Storage Manager
The main window shows a hierarchical list of objects and a grid of the objects and their properties.
From this window you can select commands to unmount, deport, import, mount, and force import.
Unmounting a Volume
To unmount a volume:
1. Click the disk group to which the volume belongs, in the left pane.
2. Select Volumes under that disk group’s icon, as shown in Figure 2.
Figure 2: Select Volumes in left pane
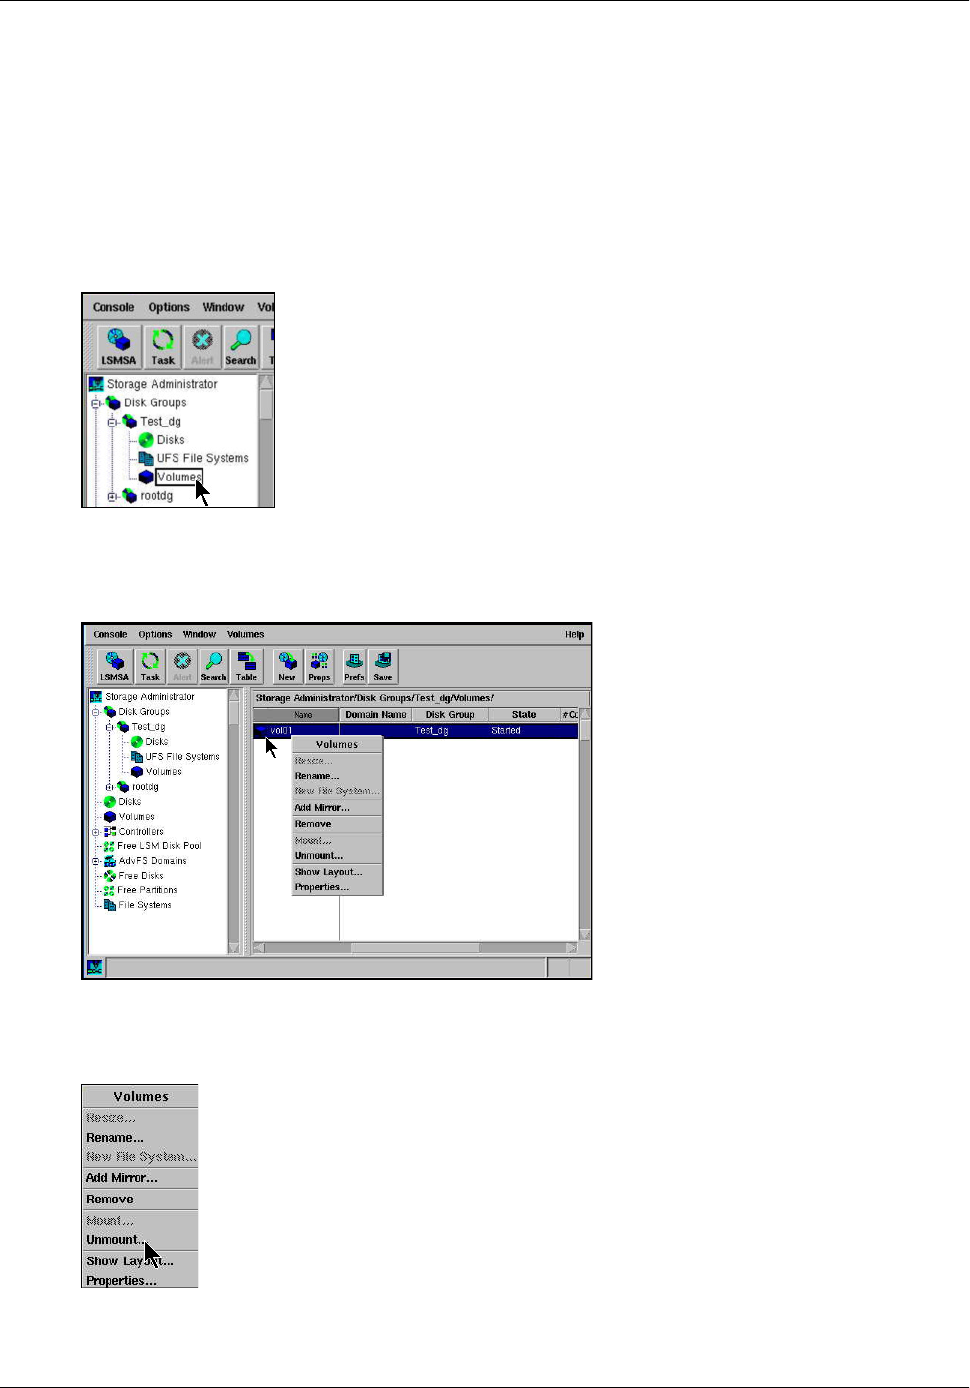
3. Right-click the volume to be unmounted, as shown in Figure 3.
Figure 3: Unmount File System window
4. Select Unmount, as shown in Figure 4.
Figure 4: Select Unmount