
FW 08.01.00/HAFM SW 08.06.xx or later HP StorageWorks Edge Switch 2/24 Installation Guide (AA-RTDWE-TE, November 2005)
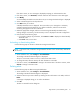


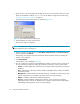
Table Of Contents
- Edge Switch 2/24 installation guide
- Contents
- Introduction to the Edge Switch 2/24
- Installing the Edge Switch
- Connecting the Edge Switch
- Edge Switch network addresses
- LAN-connecting the Edge Switch
- Setting up the HAFM appliance
- Using HAFM to configure the Edge Switch
- Setting the Edge Switch online and offline
- Configuring Edge Switch identification
- Configuring Edge Switch operating parameters
- Configuring fabric operating parameters
- Configuring switch binding
- Configuring preferred path
- Configuring ports
- Configuring SNMP trap message recipients
- Configuring, enabling, and testing e-mail notification
- Configuring and enabling call-home features
- Configuring and enabling Ethernet events
- Configuring, enabling, and testing call-home event notification
- Threshold alerts
- Creating new alerts
- Figure 30 Configure Threshold Alerts dialog box
- Figure 31 New Threshold Alerts dialog box-first screen
- Figure 32 New Threshold Alerts dialog box-second screen
- Figure 33 New Threshold Alerts dialog box-third screen
- Figure 34 New Threshold Alerts dialog box-summary screen
- Figure 35 Configure Threshold Alerts dialog box-alert activated
- Modifying alerts
- Activating or deactivating alerts
- Deleting alerts
- Creating new alerts
- Configuring SANtegrity Authentication
- Backing up HAFM configuration data
- Resetting configuration data
- Enabling the HAFM Basic interface
- Enabling Telnet
- Connecting the Edge Switch to a fabric
- Using the HAFM Basic interface
- Launching the HAFM Basic interface
- Setting the Edge Switch offline and online
- Configuring Edge Switch ports
- Configuring BB credit
- Configuring Edge Switch identification
- Configuring date and time
- Configuring Edge Switch parameters
- Configuring network information
- Configuring SNMP trap message recipients
- Enabling or disabling the CLI
- Configuring zoning
- Managing firmware versions
- Regulatory compliance and safety
- Technical specifications
- Index

Edge Switch 2/24 installation guide 61
If the alert is active, an error message is displayed prompting you to deactivate the alert.
3. If the alert is active, click Deactivate, and then select the alert information in the table again.
4. Click Modify.
An initial Modify Threshold screen that allows the you to change the threshold type is displayed.
5. Select a threshold type from the drop-down list.
6. Click Next when you are done.
A Modify Threshold screen is displayed. This screen allows you to change the % utilization,
cumulative minutes for the threshold to occur before notification, and the time interval for
measuring throughput and for alert notification.
7. Make the appropriate changes, and then continue through the Modify Threshold screens,
making changes as necessary, until the summary screen is displayed in the alert configuration.
8. Perform either of the following steps:
• If you need to change any parameters, click Previous or Next to display the desired Modify
Threshold screen.
•Click Finish when you are done.
Activating or deactivating alerts
Use the following steps to activate or deactivate existing threshold alerts:
NOTE: In the active state, notifications are generated for the alert. In the inactive state, notifications
do not occur.
1. At the Hardware view, select Configure > Threshold Alerts.
The Configure Threshold Alerts dialog box is displayed.
The port’s current state, inactive or active, is listed in the State column.
2. To change the state, select the alert by the alert information in the table.
3. If the alert is active, select Deactivate to change to the inactive state. If the alert is inactive, select
Activate to change to the active state.
Deleting alerts
Use the following steps to delete existing threshold alerts:
1. At the Hardware view, select Configure > Threshold Alerts.
The Configure Threshold Alerts dialog box is displayed.
2. Select the alert that you want to delete by selecting the alert information in the table, and click
Delete.
A message is displayed asking you to confirm the deletion.
3. Click Yes.
The alert is removed from the dialog box.