
FW 07.00.00/HAFM SW 08.06.00 HP StorageWorks Edge Switch 2/24 Installation Guide (AA-RTDWD-TE/958-000283-003, March 2005)


Table Of Contents
- Edge Switch 2/24 installation guide
- Contents
- Switch features
- Installing and configuring the Edge Switch 2/24
- Installation options
- Review installation requirements
- Unpack and Inspect the switch
- Install the Edge Switch on a desktop
- Install the Edge Switch in a rack
- Configure switch network information
- LAN-Connect the switch
- Configure the HAFM appliance
- Frequently used HAFM settings
- Set the switch online
- Set the switch offline
- Configure switch identification
- Configure switch operating parameters
- Configure fabric operating parameters
- Configure switch binding
- Configure SNMP trap message recipients
- Configure, enable, and test e-mail notification
- Configure and enable Ethernet events
- Configure call home event notification
- Configure threshold alerts
- Create new alerts
- Figure 25 Configure Threshold Alerts dialog box
- Figure 26 New Threshold Alerts dialog box-first screen
- Figure 27 New Threshold Alerts dialog box-second screen
- Figure 28 New Threshold Alerts dialog box-third screen
- Figure 29 New Threshold Alerts dialog box-summary screen
- Figure 30 Configure Threshold Alerts dialog box-alert activated
- Modify alerts
- Activate or deactivate alerts
- Delete alerts
- Create new alerts
- Configure SANtegrity authentication
- Back up HAFM configuration data
- Configure open systems management appliance
- Configure feature key
- Configure Open Trunking
- Enable Embedded Web Server
- Enable Telnet
- Connect cables to Fibre Channel ports
- Connect the switch to a fabric
- Unpack, inspect, and install the ethernet hub (optional)
- Using HAFM from a remote location
- Using the Embedded Web Server
- Manage firmware versions
- Regulatory compliance and safety
- Technical specifications
- Index
Edge Switch 2/24 installation guide 77
b. For each trap recipient to be configured, enter a community name of 32 or fewer
alphanumeric characters in the associated Community Name field. The community name is
incorporated in SNMP trap messages to ensure against unauthorized viewing or use.
c. Click the check box in the Write Authorization column to enable or disable write
authorization for the trap recipient (default is disabled). A check mark in the box indicates
write authorization is enabled. When the feature is enabled, a management workstation user
can change sysContact, sysName, and sysLocation SNMP variables.
d. Enter the IP address or DNS host name of the trap recipient (SNMP management
workstation) in the associated Trap Recipient field. Use 64 or fewer alphanumeric characters.
HP recommends that the IP address be used.
e. The default user datagram protocol (UDP) port number for trap recipients is 162. Enter a
decimal port number in the associated UDP Port Number field to override the default.
2. Click Activate to save the information. The message Your changes to the SNMP
configuration have been successfully activated is displayed.
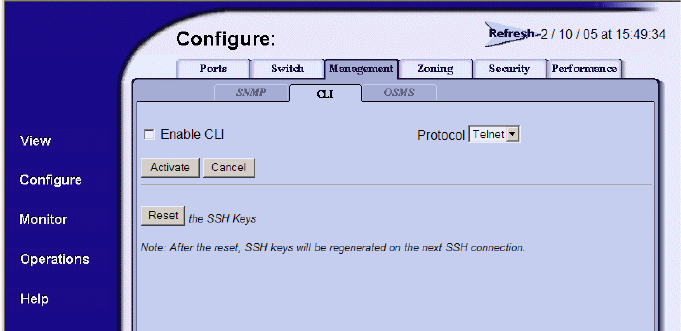
Enable or disable the CLI
Perform this procedure to toggle (enable or disable) the state of the switch’s command line interface.
To change the CLI state:
1. Select Configure > Management > CLI to display the CLI tab (Figure 44).
Figure 44 Management page—CLI tab
2. Click Enable CLI, then click Activate to activate the CLI. The message Your changes to the
CLI configuration have been successfully activated is displayed.