
4.0.0 HP PolyServe Software for Microsoft SQL Server Administration Guide (T5392-96056, March 2010)
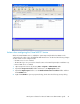


To change the primary for the Virtual MSDTC, reorder the network interfaces in the Members column.
You can also add or remove interfaces from the Virtual MSDTC configuration. After making your
changes, click OK.
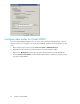
After completing the Rehost Virtual MSDTC dialog or using “drag and drop” to move the Virtual
MSDTC, you will see a progress report listing the tasks required to rehost the Virtual MSDTC. Click
Run on the progress report to start the rehost operation.
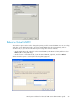
The tasks are checked off as they are performed. When all tasks are completed successfully, the
PolyServe Management Console will show the new primary node for the Virtual MSDTC.
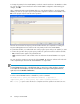
If a particular task fails, it is marked with an X on the progress report and you are asked if you want
to continue the operation. The progress report provides two options that can be used if a task fails:
• Run. Click this button again to retry the failed task.
• Undo. Click this button to undo all tasks in the list and return the Virtual MSDTC to its original
state.
You can cancel the operation at any time by clicking Cancel. HP PolyServe Software will undo each
of the completed steps and return the Virtual MSDTC to its original state.
NOTE:
A Virtual MSDTC may be left in a disabled state after it is moved via a “drag and drop” operation.
To re-enable the Virtual MSDTC, select the Virtual MSDTC on the PolyServe Management Console,
right-click, and select Enable on All Servers.
To rehost a Virtual MSDTC from the command line, use this command:
mx vmsdtc move [--policy autofailback|nofailback] [--application
<application_name> [--force yes|no] <ip> <name> <<network_interface> ...>
The --force yes option causes the move to complete even if the operation encounters an error.
Configure Virtual MSDTC84