
3.5.1 Matrix Server Administration Guide

Chapter 3: Configure Servers 48
Copyright © 1999-2007 PolyServe, Inc. All rights reserved.
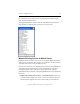
3. Select the SAN& Fencing tab on the Configure Matrix window and
then select FibreChannel switch-based fencing. In the SAN Switches
section of the tab, click the Add button to configure the new switch.
4. Click Apply at the bottom of the Configure Matrix window.
5. Go to the Matrix-Wide Configuration tab, select all servers except the
server to which you are connected, and then click the “Export To”
button.
6. Restart Matrix Server on the existing nodes.
Add a New Server
To add a new server to a matrix, complete the following steps:
1. Install Matrix Server. Perform the installation procedure in the
PolyServe Installation Guide up to the step to configure the matrix.
2. Use the following command to invoke the mxconfig utility:
# mxconfig --import
The --import option allows you to import the initial Matrix Server
configuration defined with mxconfig from an existing matrix server to
the new server. You will be asked to specify the hostname of the server
from which the configuration should be copied.
Depending on your fencing method, you might also need to specify
the hostnames of the FC switches that are directly connected to the
servers in the matrix. If you are using Web Management-based
fencing, you may be asked for additional information about the server.
Based on the fencing configuration, the information can include any or
all of the following: the vendor/type for the Remote Management
Controller, the IP address/hostname of the Remote Management
Controller, the IBM Blade slot, the username and password for the
Remote Management Controller. mxconfig then copies the initial
configuration to the new server.
3. From the Management Console, add the new server to the matrix as
described under “Configure a Server” on page 49.
4. Start Matrix Server on the server:
# /etc/init.d/pmxs start