
3.1.2 Matrix Server Installation Guide

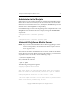
Table Of Contents
- Contents
- Configuration Information
- Install PolyServe Matrix Server
- Supported Operating Systems
- Contents of the Matrix Server Distribution
- Installation Procedure
- Installation Checklist
- 1. Set Up the SAN Environment
- 2. Install a Supported Operating System and Kernel
- 3. Install Third-Party MPIO Software (Optional)
- 4. Verify Downloaded RPMs
- 5. Install PolyServe Matrix Server
- 6. Install the Quota Tools RPM (Optional)
- 7. Specify an HBA Driver If Necessary
- 8. Reboot and Verify the HBA Configuration
- 9. Verify the SAN Configuration
- 10. Run the mxcheck Utility
- 11. Set Matrix Server Parameter for FalconStor
- 12. Configure the Matrix from the Management Console
- Test the Fencing Configuration
- Install the Management Console on Other Hosts
- Administer init.d Scripts
- Uninstall PolyServe Matrix Server
- Uninstall the Management Console
- Install MxFS-Linux
- Install the RHEL4 Operating System and Kernel
- Install the SLES9 Operating System and Kernel
- Configure the Matrix from the Command Line
- Run mxconfig
- Matrix Server License File
- Specify the Matrix Password
- Specify the Network Authentication Secret Password
- Select the Cluster Administrative Traffic Protocol
- Select a Fencing Method
- Configure FibreChannel Switches
- Set the SNMP Community String
- Modify Disk Partitioning for Membership Partitions
- Create Membership Partitions
- Add a Snapshot Configuration
- Currently, hardware snapshots are supported only on Hewlett-Packard StorageWorks Enterprise Virtual Array (EVA) storage arrays. ...
- Export the Configuration
- Verify the Fencing Configuration
- Complete the Installation
- Run mxconfig

Chapter 3: Install MxFS-Linux 34
Copyright © 1999-2007 PolyServe, Inc. All rights reserved.
2. Install the MxFS-Linux support RPM from the product CD or the
location where you have downloaded the software. Be sure to install
the RPM that corresponds to your architecture (i386 for 32-bit or
x86_64 for 64-bit).
# rpm -i <mountpoint>/mxfs-sles9-support-3.1.2-<xxxx>.<arch>.rpm
3. Install MxFS-Linux from the product CD or the location where you
have downloaded the software. Be sure to install the RPM that
corresponds to your architecture (i386 for 32-bit or x86_64 for 64-bit).
# rpm -i <mountpoint>/mxfs-3.1.2-<xxxx>.<arch>.rpm
4. Restart Matrix Server on the node:
# /etc/init.d/pmxs start
The MxFS-Linux installation copies the existing /etc/exports file to
/etc/exports.pre_mxfs and then writes over the original file. You can later
convert this file into an Export Group.
Uninstall MxFS-Linux
NOTE: If you need to uninstall MxFS-Linux before upgrading to a later
version of the product, use the directions in the PolyServe Matrix
Server Upgrade Guide.
To uninstall MxFS-Linux, run the following commands on each server:
# rpm -e mxfs
# rpm -e mxfs-sles9-support
# rpm -e mxfs-patches
NOTE:
The server will need to be rebooted with the kernel that does not
include MxFS-Linux.
If an /etc/exports.pre_mxfs file exists, it will be restored back to /etc/exports.