hp surestore auto path virtual array for Windows 2000 installation and user’s guide Edition MARCH 2001 Order No. T1011-96002 Printed in U.S.A.
Notice Trademark Information © Hewlett-Packard Company, 2001. All rights reserved. Microsoft, Windows NT, and Windows 2000 are registred trademarks of Microsoft Corporation Hewlett-Packard Company makes no warranty of any kind with regard to this material, including, but not limited to, the implied warranties of merchantability and fitness for a particular purpose.
Table of Contents 1 Product Description Overview . . . . . . . . . . . . . . . . . . . . . . . . . . . . . . . . . . . . . . . . . . . . . . . . . . . . . . . . . . . . . . . 5 Dynamic Load Balancing . . . . . . . . . . . . . . . . . . . . . . . . . . . . . . . . . . . . . . . . . . . . . . . 5 Automatic Switching to Alternate Path . . . . . . . . . . . . . . . . . . . . . . . . . . . . . . . . . . . . . 6 User Interfaces . . . . . . . . . . . . . . . . . . . . . . . . . . . . . . . . . . . . . . . . . . .
Table of Contents (continued) 3 Using Auto Path VA Introduction . . . . . . . . . . . . . . . . . . . . . . . . . . . . . . . . . . . . . . . . . . . . . . . . . . . . . . . . . . . . 15 Auto Path VA GUI . . . . . . . . . . . . . . . . . . . . . . . . . . . . . . . . . . . . . . . . . . . . . . . . . . . . . . 16 Auto Path VA Devices Window . . . . . . . . . . . . . . . . . . . . . . . . . . . . . . . . . . . . . . . . . . . . 17 Selecting a Server and Array . . . . . . . . . . . . . . . . . . . . . . . . .
1 PRODUCT DESCRIPTION Product Description Overview Congratulations on your purchase of the HP SureStore Auto Path Virtual Array (Auto Path VA) product. This software product provides automatic input/output (I/O) path failover and load balancing for servers configured with multiple host bus adapters connected to HP SureStore Virtual Arrays. Typically, system disk I/O is sent directly to the Windows disk driver.
Automatic Switching to Alternate Path If a data path fails, Auto Path VA automatically switches to an alternate path, dropping the failed path out of the I/O rotation without any loss of data. The switchover is completely transparent to applications, so normal operation continues without downtime. All path changes are logged in the Windows Event Viewer log, allowing administrators to investigate and repair failed paths.
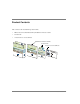
Product Contents The contents of the Auto Path VA product include: • HP StoreStore Auto Path Virtual Array Installation and User’s Guide • Software CD • 1 Host License-to-Use Certificate Installation and User’s Guide Software CD License-to-Use Certificate Product Contents 7
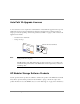
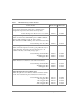
Auto Path VA Upgrade Licenses A one host license-to-use is required for each installation of Auto Path VA. Upgrade licenses provide additional host usage for the Auto Path VA product. These upgrade licenses can increase the host usage up to 25 hosts, depending on the license purchased (see Table 1 on page 9).
Table 1 HP Modular Storage Software Products Software Product HP Sales Rep. HP Reseller T1001A T1020A T1002A T1021A T1007A T1008A T1009A T1026A T1027A T1028A T1003A T1004A T1005A T1022A T1023A T1024A T1011A T1012A T1013A T1014A T1015A T1030A T1031A T1032A T1033A T1034A Command View SDM Storage device management enables array configuration and management and provides value-added software products.
Warranty This software package comes with a 90 day media defect warranty. If you have any problems with the quality of the CD or the supporting documentation, you can return it for exchange through any HP sales office or authorized HP reseller. Technical Support Technical support is provided for this product through an HP Support Contract, purchased at the time you purchased this product. See the HP Support Contract for information on technical support.
2 AUTO PATH VA INSTALLATION The HP SureStore Auto Path Virtual Array (Auto Path VA) graphical user interface (GUI) consists of two components: server and client. You install the server on the host connected to the HP SureStore Virtual Array. You can install the client on either the host that the server is on or on a remote host connected through the network. Each installation of Auto Path VA requires a one host license-to-use (LTU).
System Requirements The following system requirements must be met to install Auto Path VA: • Windows 2000 with service pack 1. • 30 MB of available disk space. • Administrator access to Windows 2000. • Connections to an operational HP SureStore Virtual Array. • 1024 x 768 minimum display resolution. HP Netservers Auto Path VA is fully supported on HP Netservers using HP’s D8602B host bus adapter.
Installing Auto Path VA Auto Path VA is installed using an automated installation program. See the readme.txt file on the installation CD for more details about installation. To install Auto Path VA: 1. Log on to the sever as administrator. 2. Insert the CD with the Auto Path VA installation program into the CD-ROM drive (for example, drive E:). If Autorun is enabled on the server, the Auto Path VA installation window is displayed. Follow the on-screen instructions to complete the installation. 3.
Uninstalling Auto Path VA To uninstall Auto Path VA, use the Windows 2000 deinstallation program. To uninstall Auto Path VA: 1. Go to the Windows 2000 Control Panel, and then double-click the Add/Remove Programs icon. 2. Select HP SureStore Auto Path Virtual Array from the list, and then click Add/Remove. 3. Follow the on-screen instructions to uninstall the Auto Path VA program files.
3 USING AUTO PATH VA HP SureStore Auto Path Virtual Array (Auto Path VA) operations can be accessed from both a graphical user interface and a command-line user interface. These operations display path information for the various devices (LUNs) and host bus adapters. The administrator can also use these operations to change the load balancing policy or the preferred path to a certain device.
Auto Path VA GUI After installing Auto Path VA, you can start the graphical user interface (GUI). To start the Auto Path VA GUI, you must have user access to the host connected to the HP SureStore Virtual Array. To use the Auto Path VA GUI, you must start both its server and client. Depending on the options you selected during the installation, you can start the GUI’s server and client using either an icon on the Windows desktop or from the Windows Start menu.
Auto Path VA Devices Window The Auto Path VA program always starts by displaying the Devices window. This window shows the devices (LUNs) configured on the selected HP SureStore Virtual Array. The first time the Auto Path VA GUI is started after installation, the Devices window does not show any servers or arrays in the corresponding drop-down menus. To add servers to the menu, use the Add New Server window. See section ”Adding a Server” on page 19 for instructions.
The Auto Path VA Devices window contains the following items: • Server Name. Drop-down menu that lets you select a server. • Disk Array. Drop-down menu that lets you select the active array for the window. • Devices tab. Opens the Devices window. • Adapters tab. Opens the Adapters window. See section ”Auto Path VA Adapters Window” on page 25 for information. • Device#. The total number of devices (LUNs) configured on the selected array. • Device Name. The device name. • Serial#.
Selecting a Server and Array The drop-down menus in the Devices window let you easily select the server and connected arrays. To select a server and array: 1. From the Devices window, select a server from the Server drop-down menu. This displays information for the first array connected to the selected server. 2. From the Devices window, select an array from the Disk Array drop-down menu. (This menu shows all of the arrays connected to the selected server.
Deleting a Server From the Devices window, you can delete a server from the list of available servers. To delete a server: 1. From the Devices window, select Delete a Server from the File drop-down menu. This displays the Delete a server dialog box. 2. In the Delete a server box, type either the server name or the IP address for the server you want to delete. 3. Click Delete. This deletes the server name from the Server Name drop-down list, and then displays the Devices window.
Auto Path VA Device Settings Window The Device Settings window shows the various paths to a device and either the load balancing policy or preferred path for the device. To open the Device Settings window, click the Device Settings button in the Devices window. See section ”Auto Path VA Devices Window” on page 17 for information.
The Auto Path VA Device Settings window has the following items: • Server Name. The name or IP address of the server. • Disk Array Unit. The serial number of the array. • Device Serial Number. The serial number of the selected device. • Device Name. The name of the selected device. • Load Balancing Policy. The load balancing policy for the selected device. • Preferred Path Number. The preferred path for the selected device.
Setting the Load Balancing Policy The Auto Path VA Device Settings window lets you set the load balancing policy for a selected device. All of the load balancing policies determine their actions based upon the current queue depths of all of the paths available to the device. The only difference between policies is how they measure the queue depth. All of the policies, except Round Robin, tend to shift the I/O load from heavily loaded paths or resources to more lightly loaded ones.
Setting the Preferred Path The Auto Path VA Device Settings window lets you set the preferred path when you do not have a load balancing policy for a device. This option is available only when the selected device does not have a load balancing policy. To set the preferred path: 1. From the Devices window, select the server and then the array. 2. Select the device whose preferred path you want to set. 3. Click the Device Settings button. This displays the Auto Path VA Device Settings window. 4.
Auto Path VA Adapters Window The Adapters window shows all host bus adapters installed on the host, even if the adapter is not compatible (non fibre channel) with Auto Path VA. The Adapters window shows the non-compatible adapters with an Active state but 0 (zero) for the number of paths. The Adapters window is a view-only window and therefore has no user-configurable functions. To open it, click the Adapters tab in the Devices window. See section ”Auto Path VA Devices Window” on page 17 for information.
The Auto Path VA Adapters window has the following items: • Server Name. Drop-down menu that lets you select a server. • Devices tab. Opens the Devices window. See section ”Auto Path VA Devices Window” on page 17 for information. • Adapters tab. Opens the Auto Path VA Adapters window. • Adapter #. Identifies the host bus adapter. • Adapter Name. The name of the host bus adapter. • Adapter State. The state of the host bus adapter: – Active. The host bus adapter is in use. – Failed.
Command-Line User Interface Auto Path VA’s command-line user interface (CLUI) can be used only on hosts that are both connected to an HP SureStore Virtual Array and have the Auto Path VA driver installed. You can execute CLUI commands only from the directory where the installed Auto Path VA program files reside. If you chose the default directory when you performed the Auto Path VA installation, change the directory to C:\Program Files\HP\AutoPath, and then execute the CLUI commands.
autopath adapters Display host bus adapter names. Syntax autopath adapters Description The autopath adapters command displays the names of all host bust adapters installed on the host, even if the adapter is not compatible (non fibre channel) with Auto Path VA. This command displays the non-compatible adapters with an Active state but 0 (zero) for the number of paths. Example C:\...
autopath devices Display devices. Syntax autopath devices Description The autopath devices command displays information for the devices (LUNs) in the array. Example C:\...\AutoPath\autopath devices Device# Device Name Serial No.
autopath help Display help. Syntax autopath help Description The autopath help command opens the help for the autopath command-line user interface supported commands.
autopath paths device Display paths to device. Syntax autopath paths device=device_number where device_number is the device number shown in the autopath devices command-line display. Description The autopath paths device command displays the paths to the device identified by device_number. Examples Example of a device with a load balancing policy: C:\...
autopath set device Set either load balancing policy or preferred path. Syntax autopath set device=device_number {policy=policy_name | path=path_number} • device_number The device number shown in the autopath devices command-line display. • policy_name The name of the load balancing policy. See section ”Setting the Load Balancing Policy” on page 23 for a list of available policies. • path_number The preferred path number.
4 TROUBLESHOOTING Troubleshooting Introduction Troubleshooting can be performed by the customer or an HP service representative, depending on your HP service contract. If you are unable to resolve an error condition, ask your HP service representative for assistance.
Recovering After a Path Failure If a data path fails, Auto Path VA automatically switches to an alternate path, dropping the failed path out of the I/O rotation without any loss of data. The switchover is completely transparent to applications, so normal operation continues without downtime. All path changes are logged in the Windows Event Viewer log, allowing administrators to investigate and repair failed paths.
Troubleshooting Auto Path VA To troubleshoot Auto Path VA, you can use these Windows 2000 troubleshooting tools: Event Viewer All activity on the paths is shown by Event Viewer. The viewer logs all errors (disk, adapter, and I/O) and when a path is taken out of service. Windows Diagnostics The Administrative Tools utility, accessed from the Windows Control Panel, shows all devices connected to the Windows 2000 system. Windows Registry Back up the Registry before executing the Registry Editor.
Web Support New product offerings, product updates, support software and options are continually becoming available. For the most current product information, access the HP web site. Two categories of information are available: general product and technical support (software updates, firmware, and documentation). To access either one of these categories, go to the HP home page and then follow the links to the specific information you need.