
HP Storage Essentials V5.1 Installation Guide Second Edition (Linux Release) (T4283-96055, November 2006)
Installing the Management Server on Linux20
Step 2 - Install the Management Server
Install the management server on the same computer as you installed Oracle as described in ”Step
1 - Install the Oracle Database” on page 10.
Keep in mind the following:
• Refer to the release notes for late breaking information.
• Make sure no other programs are running when you install the management server.
• When you install the management server on Linux, you must install the software using a POSIX
(Portable Operating System Interface) shell, such as sh. C Shell is not supported.
• If you receive a message saying there is not enough room in the temp directory to perform the
installation, set the IATEMPDIR variable to another directory. The installation uses this directory to
extract the installation files. Refer to the documentation for your operating system for information
on how to set this variable.
• You must install the management server on a machine with a static IP address.
• When you install the management server on Linux, the following files from InstallAnywhere are
left with writable permissions, and they should not be modified. Modifying them may impact
other installations that use InstallAnywhere:
• $mgr_dist/Uninstall_<product_name>/.com.zerog.registry.xml
• /var/.com.zerog.registry.xml
• Verify that the required software is available on your system as described in ”Software
Dependencies for Storage Essentials” on page 9.
To install the management server:
1. Access the Linux host as described in ”Accessing the Linux Host” on page 12.
2. Insert the CD-ROM for installing the management server in the CD-ROM drive of the server and
mount it by using the following commands:
# mkdir -p /mnt/installer
# mount /dev/cdrom /mnt/installer
where /dev/cdrom is the CD device.
3. Enter the following at the command prompt (if you mounted the CD device at the
/mnt/installer location)
# /mnt/installer/InstallManager.bin
4. When you see the introduction screen, click Next.
5. When you are asked for an installation directory, you can select the default or choose your own.
To choose your own directory, click the Choose button. You can always display the default
directory by clicking the Restore Default Folder button. When you are done, click Next.
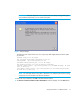
6. Check the pre-installation summary. You are shown the following:
•Product Name
• Installation Folder
• Disk Space Required
• Disk Space Available