
Veritas Storage Foundation™ 5.0.1 for Oracle RAC Installation, Configuration, and Administrator's Guide Extracts for the HP Serviceguard Storage Management Suite on HP-UX 11i v3


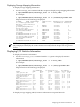

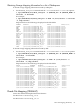
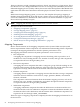
Table Of Contents
- Veritas Storage Foundation™ 5.0.1 for Oracle RAC Installation, Configuration, and Administrator's Guide Extracts for the HP Serviceguard Storage Management Suite on HP-UX 11i v3
- Table of Contents
- Preface
- 1 Introducing Serviceguard Extension for RAC
- About Serviceguard Extension for RAC
- How Serviceguard Extension for RAC Works (High-Level Perspective)
- Component Products and Processes of SG SMS Serviceguard Cluster File System for RAC
- Communication Infrastructure
- Cluster Interconnect Communication Channel
- Low-level Communication: Port Relationship Between GAB and Processes
- Cluster Volume Manager
- Cluster File System
- Oracle Disk Manager
- Additional Features of Serviceguard Extension for RAC
- 2 Planning SGeRAC Installation and Configuration
- 3 Configuring the Repository Database for Oracle
- 4 Using Storage Checkpoints and Storage Rollback
- About Storage Checkpoints and Storage Rollback in SGeRAC
- Using Storage Checkpoints and Storage Rollback for Backup and Restore
- Determining Space Requirements for Storage Checkpoints
- Performance of Storage Checkpoints
- Backing up and Recovering the Database Using Storage Checkpoints
- Guidelines for Oracle Recovery
- Using the Storage Checkpoint Command Line Interface (CLI)
- Examples of Using the Command Line Interface
- Prerequisites
- Creating or Updating the Repository Using dbed_update
- Creating Storage Checkpoints Using dbed_ckptcreate
- Displaying Storage Checkpoints Using dbed_ckptdisplay
- Mounting Storage Checkpoints Using dbed_ckptmount
- Unmounting Storage Checkpoints Using dbed_ckptumount
- Performing Storage Rollback Using dbed_ckptrollback
- Removing Storage Checkpoints Using dbed_ckptremove
- Cloning the Oracle Instance Using dbed_clonedb
- 5 Using FlashSnap for Backup and Recovery
- About Veritas Database FlashSnap
- Planning to Use Database FlashSnap
- Preparing Hosts and Storage for Database FlashSnap
- Summary of Database Snapshot Steps
- Creating a Snapplan (dbed_vmchecksnap)
- Validating a Snapplan (dbed_vmchecksnap)
- Displaying, Copying, and Removing a Snapplan (dbed_vmchecksnap)
- Creating a Snapshot (dbed_vmsnap)
- Backing Up the Database from Snapshot Volumes (dbed_vmclonedb)
- Cloning a Database (dbed_vmclonedb)
- Resynchronizing the Snapshot to Your Database
- Removing a Snapshot Volume
- 6 Investigating I/O Performance for SGeRAC: Storage Mapping
- A Troubleshooting SGeRAC

Recreating Oracle Tempfiles
After a clone database is created and opened, the tempfiles are added if they were residing on
the snapshot volumes. If the tempfiles were not residing on the same file systems as the datafiles,
dbed_vmsnap does not include the underlying volumes in the snapshot. In this situation,
dbed_vmclonedb issues a warning message and you can then recreate any needed tempfiles on
the clone database as described in the following procedure.
To recreate the Oracle tempfiles:
1. If the tempfiles were not residing on the same file systems as the datafiles, dbed_vmclonedb
will display WARNING and INFO messages similar to the following:
WARNING: Not all tempfiles were included in snapshot for $ORACLE_SID, there is no snapshot volume for
/clone_path/temp02.dbf.
WARNING: Could not recreate tempfiles for $ORACLE_SID due to lack of free space. INFO: The sql script for
adding tempfiles to $ORACLE_SID is at /tmp/add_tf.$ORACLE_SID.sql.
where $ORACLE_SID is the name of the clone database.
2. A script named add_tf.$ORACLE_SID.sql is provided in the /tmp directory for the
purpose of recreating Oracle tempfiles. This script contains the SQL*Plus commands to
recreate the missing tempfiles.
3. Make a copy of the /tmp/add_tf.$ORACLE_SID.sql script and open it to view the list
of missing tempfiles.
An example of the add_tf.$ORACLE_SID.sql script is shown below:
# cat /tmp/add_tf.$ORACLE_SID.sql
-- Commands to add tempfiles to temporary tablespaces.
-- Online tempfiles have complete space information.
-- Other tempfiles may require adjustment.
ALTER TABLESPACE TEMP ADD TEMPFILE
'/clone_path/temp01.dbf'
SIZE 4194304 REUSE AUTOEXTEND ON NEXT 1048576 MAXSIZE 33554432 ;
ALTER TABLESPACE TEMP ADD TEMPFILE
'/clone_path/temp02.dbf' REUSE;
ALTER DATABASE TEMPFILE '/clone_path2/temp02.dbf'
OFFLINE;
4. Evaluate whether you need to recreate any temp files. If you want to recreate tempfiles,
proceed to the next step.
5. In the add_tf.$ORACLE_SID.sql file, edit the sizes and default path names of the tempfiles
as needed to reside on cloned volumes configured for database storage.
CAUTION: Do not run the script without first editing it because path names may not exist
and the specified mount points may not contain sufficient space.
6. After you have modified the add_tf.$ORACLE_SID.sql script, execute it against your
clone database.
7. After you have successfully run the script, you may delete it.
Resynchronizing the Snapshot to Your Database
When you have finished using a clone database or want to refresh it, you can resynchronize it
with the original database. This is also known as refreshing the snapshot volume or merging the
split snapshot image back to the current database image. After resynchronizing, the snapshot
can be retaken for backup or decision-support purposes.
You can resynchronize the snapshot from the original volume.
Resynchronizing the Snapshot to Your Database 81