
Veritas Storage Foundation™ 5.0.1 for Oracle RAC Installation, Configuration, and Administrator's Guide Extracts for the HP Serviceguard Storage Management Suite on HP-UX 11i v3
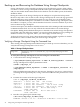
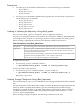
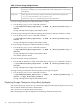
Table Of Contents
- Veritas Storage Foundation™ 5.0.1 for Oracle RAC Installation, Configuration, and Administrator's Guide Extracts for the HP Serviceguard Storage Management Suite on HP-UX 11i v3
- Table of Contents
- Preface
- 1 Introducing Serviceguard Extension for RAC
- About Serviceguard Extension for RAC
- How Serviceguard Extension for RAC Works (High-Level Perspective)
- Component Products and Processes of SG SMS Serviceguard Cluster File System for RAC
- Communication Infrastructure
- Cluster Interconnect Communication Channel
- Low-level Communication: Port Relationship Between GAB and Processes
- Cluster Volume Manager
- Cluster File System
- Oracle Disk Manager
- Additional Features of Serviceguard Extension for RAC
- 2 Planning SGeRAC Installation and Configuration
- 3 Configuring the Repository Database for Oracle
- 4 Using Storage Checkpoints and Storage Rollback
- About Storage Checkpoints and Storage Rollback in SGeRAC
- Using Storage Checkpoints and Storage Rollback for Backup and Restore
- Determining Space Requirements for Storage Checkpoints
- Performance of Storage Checkpoints
- Backing up and Recovering the Database Using Storage Checkpoints
- Guidelines for Oracle Recovery
- Using the Storage Checkpoint Command Line Interface (CLI)
- Examples of Using the Command Line Interface
- Prerequisites
- Creating or Updating the Repository Using dbed_update
- Creating Storage Checkpoints Using dbed_ckptcreate
- Displaying Storage Checkpoints Using dbed_ckptdisplay
- Mounting Storage Checkpoints Using dbed_ckptmount
- Unmounting Storage Checkpoints Using dbed_ckptumount
- Performing Storage Rollback Using dbed_ckptrollback
- Removing Storage Checkpoints Using dbed_ckptremove
- Cloning the Oracle Instance Using dbed_clonedb
- 5 Using FlashSnap for Backup and Recovery
- About Veritas Database FlashSnap
- Planning to Use Database FlashSnap
- Preparing Hosts and Storage for Database FlashSnap
- Summary of Database Snapshot Steps
- Creating a Snapplan (dbed_vmchecksnap)
- Validating a Snapplan (dbed_vmchecksnap)
- Displaying, Copying, and Removing a Snapplan (dbed_vmchecksnap)
- Creating a Snapshot (dbed_vmsnap)
- Backing Up the Database from Snapshot Volumes (dbed_vmclonedb)
- Cloning a Database (dbed_vmclonedb)
- Resynchronizing the Snapshot to Your Database
- Removing a Snapshot Volume
- 6 Investigating I/O Performance for SGeRAC: Storage Mapping
- A Troubleshooting SGeRAC

Backing up and Recovering the Database Using Storage Checkpoints
Storage Checkpoints can be created by specifying one of the following options: online, offline,
or instant. To create a Storage Checkpoint with the online option, the database should be online
and you must enable ARCHIVELOG mode for the database. For the offline option, the database
should be offline.
During the creation of the Storage Checkpoint, the tablespaces are placed in backup mode.
Because it only takes a few seconds to take a Storage Checkpoint, the extra redo logs generated
while the tablespaces are in online-backup mode are very small. You can roll back the entire
database or individual tablespaces or datafiles to an online or offline Storage Checkpoint. After
the rollback is complete, you may roll the database forward to restore the database if you have
used an online Storage Checkpoint.
For the instant option, the database should be online and it can be running in either ARCHIVELOG
or NOARCHIVELOG mode. You can only roll back the entire database to an instant Storage
Checkpoint. Rolling back individual tablespaces or datafiles to an instant Storage Checkpoint is
not possible. After the rollback is complete, you need to perform database recovery. Rolling the
database forward is not supported; that is, you cannot apply archived redo logs.
To allow the easiest recovery, always keep ARCHIVELOG mode enabled, regardless of whether
the database is online or offline when you create Storage Checkpoints.
Verifying a Storage Checkpoint Using the Command Line
After creating a Storage Checkpoint and before using it to back up or restore a database, you can
verify that the Storage Checkpoint is free of errors.
Table 4-1 Storage Checkpoint Notes
See the dbed_ckptcreate(1M) and dbed_ckptmount(1M) manual pages for more
information.
Usage notes
To verify that a Storage Checkpoint is error-free using the command line.
1. Create and mount a Storage Checkpoint.
# /opt/VRTS/bin/dbed_ckptcreate -S PROD -H /oracle/product -o online
Storage Checkpoint Checkpoint_903937870 created.
# mkdir /tmp/ckpt_ro
# /opt/VRTS/bin/dbed_ckptmount -S PROD -c Checkpoint_903937870 -m \
/tmp/ckpt_ro
If the specified mount point directory does not exist, then dbed_ckptmount creates it before
mounting the Storage Checkpoint, as long as the Oracle DBA user has permission to create
it.
2. Examine the contents of the Storage Checkpoint.
# ls -l /tmp/ckpt_ro/dbvol_82/dbinst1
drwxr-xr-x 3 oracle dba 1024 Nov 11 2000 .
drwxr-xr-x 3 oracle dba 512 Nov 16 11:00 ..
-rw-r--r-- 1 oracle dba 209747968 Nov 16 10:58 .tstmp
-rw-r--r-- 1 oracle dba 209747968 Nov 16 10:58 .tstab
lrwxrwxrwx 1 oracle dba 18 Nov 11 2000 tstmp ->
.tstmp::cdev:vxfs:
lrwxrwxrwx 1 oracle dba 18 Nov 11 2000 tstab ->
.tstab::cdev:vxfs:
3. Run dbv tool against Quick I/O file tstmp.
# dbv file=/tmp/ckpt_ro/db01/tstmp
DBVERIFY: Release 9.2.0.2.0 - Production on Mon Mar 7 11:48:35 2005
34 Using Storage Checkpoints and Storage Rollback