
Managing Serviceguard A.11.20, March 2013


NOTE: Do not edit the configuration file SG-CFS-pkg.conf. Create and modify configuration
using the cfs administration commands.
1. First, make sure the cluster is running:
cmviewcl
2. If it is not, start it:
cmruncl
3. If you have not initialized your disk groups, or if you have an old install that needs to be
re-initialized, use the vxinstall command to initialize VxVM/CVM disk groups. See
“Initializing the Veritas Volume Manager ” (page 225).
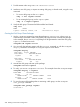
4. Activate the SG-CFS-pkg and start up CVM with the cfscluster command; this creates
SG-CFS-pkg, and also starts it.
This example, for the cluster file system, uses a timeout of 900 seconds; if your CFS cluster
has many disk groups and/or disk LUNs visible to the cluster nodes, you may need to a longer
timeout value. Use the -s option to start the CVM package in shared mode:
cfscluster config -t 900 -s
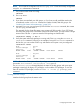
5. Verify the system multi-node package is running and CVM is up, using the cmviewcl or
cfscluster command. Following is an example of using the cfscluster command. In
the last line, you can see that CVM is up, and that the mount point is not yet configured:
cfscluster status
Node : ftsys9
Cluster Manager : up
CVM state : up (MASTER)
MOUNT POINT TYPE SHARED VOLUME DISK GROUP STATUS
Node : ftsys10
Cluster Manager : up
CVM state : up
MOUNT POINT TYPE SHARED VOLUME DISK GROUP STATUS
NOTE: Because the CVM system multi-node package automatically starts up the Veritas processes,
do not edit /etc/llthosts, /etc/llttab, or /etc/gabtab.
The cfscluster status command displays the status of the disk groups and mount point
packages created only for legacy CFS packages, not for modular CFS packages. To view the
status of modular CFS packages, use the cmviewcl –v –f line –p <package_name>
command.
Creating the Disk Groups
Initialize the disk group from the master node.
Configuring the Cluster 207