
Managing Serviceguard 13th Edition, February 2007


Building an HA Cluster Configuration
Creating the Storage Infrastructure and Filesystems with VERITAS Cluster Volume Manager (CVM)
Chapter 5 247
# vxdctl -c mode
One node will identify itself as the master. Create disk groups from this
node.
Initializing Disks for CVM
You need to initialize the physical disks that will be employed in CVM
disk groups. If a physical disk has been previously used with LVM, you
should use the pvremove command to delete the LVM header data from
all the disks in the volume group (this is not necessary if you have not
previously used the disk with LVM).
To initialize a disk for CVM, log on to the master node, then use the
vxdiskadm program to initialize multiple disks, or use the vxdisksetup
command to initialize one disk at a time, as in the following example:
# /usr/lib/vxvm/bin/vxdisksetup -i c4t3d4
Creating Disk Groups
Use the following steps to create disk groups.
1. Use the vxdg command to create disk groups. Use the -s option to
specify shared mode, as in the following example:
# vxdg -s init logdata c0t3d2
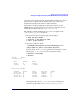
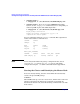
2. Verify the configuration with the following command:
# vxdg list
NAME STATE ID
rootdg enabled 971995699.1025.node1
logdata enabled,shared 972078742.1084.node2
3. Activate the disk group, as follows, before creating volumes:
# vxdg -g logdata set activation=ew
Creating Volumes
Use the vxassist command to create volumes, as in the following
example: