
Managing Serviceguard 12th Edition, March 2006

Building an HA Cluster Configuration
Creating the Storage Infrastructure and Filesystems with LVM and VxVM
Chapter 5 217
# mount /dev/vgdatabase/lvol1 /mnt1
10. Unmount the volume group on
ftsys10
:
# umount /mnt1
11. Deactivate the volume group on
ftsys10
:
# vgchange -a n /dev/vgdatabase
Making Physical Volume Group Files Consistent Skip ahead to
the next section if you do not use physical volume groups for mirrored
individual disks in your disk configuration.
Different volume groups may be activated by different subsets of nodes
within a Serviceguard cluster. In addition, the physical volume name for
any given disk may be different on one node than it is on another. For
these reasons, you must carefully merge the /etc/lvmpvg files on all
nodes so that each node has a complete and consistent view of all
cluster-aware disks as well as of its own private (non-cluster-aware)
disks. To make merging the files easier, be sure to keep a careful record
of the physical volume group names on the volume group planning
worksheet (described in the “Planning” chapter).
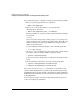
Use the following procedure to merge files between the configuration
node (
ftsys9
) and a new node (
ftsys10
) to which you are importing
volume groups:
1. Copy /etc/lvmpvg from
ftsys9
to /etc/lvmpvg.new on
ftsys10
.
2. If there are volume groups in /etc/lvmpvg.new that do not exist on
ftsys10
, remove all entries for that volume group from
/etc/lvmpvg.new.
3. If /etc/lvmpvg on
ftsys10
contains entries for volume groups that
do not appear in /etc/lvmpvg.new, then copy all PVG entries for
that volume group to /etc/lvmpvg.new.
4. Adjust any physical volume names in /etc/lvmpvg.new to reflect
their correct names on
ftsys10
.
5. On
ftsys10
, copy /etc/lvmpvg to /etc/lvmpvg.old to create a
backup. Copy /etc/lvmvpg.new to /etc/lvmpvg on
ftsys10
.