
Managing Serviceguard Extension for SAP Version B.05.10, September 2010

If you are using ORACLE:
Create a mount point for the Oracle files on the alternate nodes if it is not already there.
Example:
su - ora<sid>
mkdir -p /oracle/<SID>
exit
MAXDB Database Step: SD170
Create a mount point for the SAPDB files on the alternate nodes if it is not already there.
Example:
su - sqd<dbsid>
mkdir -p /sapdb/<DBSID>
DB2 Installaton Step: DB180
Create mount points for DB2 files on alternate node if they are not already there.
Example:
su – db2<dbsid>
mkdir –p /db2/<DBSID>
mkdir –p /db2/db2<dbsid>
Installation Step: IS190
In full CFS environments, this step can be omitted.
If CFS is only used for SAP and not for the database, then the volume group(s) that are required
by the database need to be distributed to all cluster nodes.
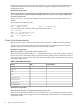
Import the shared volume groups using the minor numbers specified in Table 1 — “Instance
Specific Volume Groups” contained in chapter "Planning the Storage Layout."
The whole volume group distribution should be done using the command line interface. Do not
use SAM. SAM will not create minor numbers in the intended fashion. Specify the device minor
numbers explicitly by creating the group file manually.
On possible failover nodes, for example:
mkdir /dev/vgdb<SID>
mknod /dev/vgdb<SID>/group c 64 0x080000
Now you can use vgimport(1m) with the map file reated on the primary host during Step
IS020.
Installation Step: IS210
Create a local directory for saposcol temporary data on all cluster nodes.
Example:
mkdir -p /usr/sap/tmp
Installation Step: IS220
Create a local mount point for each file system that was specified in chapter "Planning the
Storage Layout to have shared disk" or HA NFS" access point.
Refer to the tables in chapter 2 for Instance, System ,and Environment specific volume groups,
and the corresponding tables that represent entries for the required database type. Depending
on the past usage of the hosts, some of the directories might already exist.
For non-CFS options only:
su - <sid>adm
mkdir -p /sapmnt/<SID>
mkdir -p /usr/sap/trans
mkdir -p /usr/sap/<SID>/<INSTNAME><INSTNR>
exit
MAXDB Database Step: SD230
HP-UX Configuration 59