
Using Serviceguard Extension for RAC, 10th Edition, April 2013


NOTE: Contact Oracle to determine if your version of Oracle RAC allows “resilvering” and to
appropriately configure the mirror consistency recovery policy for your logical volumes.
In the case Oracle “resilvering” is available, create logical volumes for use as Oracle data files
by using the same options as in the following example:
# lvcreate -m 1 -M n -c n -s g -n system.dbf -L 408 /dev/vg_rac
• -m 1—Specifies single mirroring.
• -M n—Ensures that mirror write cache recovery is set to OFF.
• -c n—Mirror consistency recovery is disabled.
• -s g—Mirroring is PVG-strict. It occurs between different physical volume groups.
• -n system.dbf—Specify the name of the logical volume.
• -L 408—Allocates 408 megabytes.
If the command is successful, the system will display messages like the following:
Logical volume “/dev/vg_rac/system.dbf” has been successfully created
with character device “/dev/vg_rac/rsystem.dbf”
Logical volume “/dev/vg_rac/system.dbf” has been successfully extended
NOTE: The character device file name (also called the raw logical volume name) is used by the
Oracle DBA in building the OPS database.
Creating RAC Volume Groups on Disk Arrays
The procedure described in this section assumes that you are using RAID-protected disk arrays and
LVM’s physical volume links (PV links) to define redundant data paths from each node in the cluster
to every logical unit on the array.
On your disk arrays, you should use redundant I/O channels from each node, connecting them
to separate controllers on the array. Then you can define alternate links to the LUNs or logical
disks you have defined on the array. If you are using SAM, choose the type of disk array you wish
to configure, and follow the menus to define alternate links. If you are using LVM commands,
specify the links on the command line.
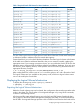
The following example shows how to configure alternate links using LVM commands. The following
disk configuration is assumed:
8/0.15.0 /dev/dsk/c0t15d0 /* I/O Channel 0 (8/0) SCSI address 15 LUN 0 */
8/0.15.1 /dev/dsk/c0t15d1 /* I/O Channel 0 (8/0) SCSI address 15 LUN 1 */
8/0.15.2 /dev/dsk/c0t15d2 /* I/O Channel 0 (8/0) SCSI address 15 LUN 2 */
8/0.15.3 /dev/dsk/c0t15d3 /* I/O Channel 0 (8/0) SCSI address 15 LUN 3 */
8/0.15.4 /dev/dsk/c0t15d4 /* I/O Channel 0 (8/0) SCSI address 15 LUN 4 */
8/0.15.5 /dev/dsk/c0t15d5 /* I/O Channel 0 (8/0) SCSI address 15 LUN 5 */
10/0.3.0 /dev/dsk/c1t3d0 /* I/O Channel 1 (10/0) SCSI address 3 LUN 0 */
10/0.3.1 /dev/dsk/c1t3d1 /* I/O Channel 1 (10/0) SCSI address 3 LUN 1 */
10/0.3.2 /dev/dsk/c1t3d2 /* I/O Channel 1 (10/0) SCSI address 3 LUN 2 */
10/0.3.3 /dev/dsk/c1t3d3 /* I/O Channel 1 (10/0) SCSI address 3 LUN 3 */
10/0.3.4 /dev/dsk/c1t3d4 /* I/O Channel 1 (10/0) SCSI address 3 LUN 4 */
10/0.3.5 /dev/dsk/c1t3d5 /* I/O Channel 1 (10/0) SCSI address 3 LUN 5 */
Assume that the disk array has been configured, and that both the following device files appear
for the same LUN (logical disk) when you run the ioscan command:
/dev/dsk/c0t15d0
/dev/dsk/c1t3d0
Use the following procedure to configure a volume group for this logical disk:
1. Set up the group directory for vg_rac:
Creating a Storage Infrastructure with LVM 45