
- Hewlett-Packard All in One Printer User Manual

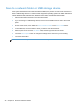


Table Of Contents
- Product basics
- Control panel
- Supported utilities for Windows
- Configure the product
- Load originals
- Scan and send documents
- Manage and maintain the product
- Solve problems
- Error codes
- Basic troubleshooting tips
- Restore factory settings
- Interpret control-panel status lights
- Control-panel message types
- Control-panel messages
- Installation problems
- Initialization or hardware problems
- Operation problems
- Product will not turn on
- Lamp stays on
- Scan does not start right away
- Only one side of a two-sided page scans
- Scanned pages are missing at the scan destination
- Scanned pages are out of order at the scan destination
- Optimize scanning and task speeds
- The scan is completely black or completely white
- Scanned images are not straight
- Scan files are too large
- Paper path problems
- Paper jamming, skewing, misfeeds, or multiple-page feeds
- Scanning fragile originals
- Paper does not feed correctly
- Originals are curling up in the output tray
- The bottom of the scanned image is cut off
- The scanned images have streaks or scratches
- An item loaded in the document feeder jams repeatedly
- Clear jams from the paper path
- Solve e-mail problems
- Solve network problems
- Contact HP Support
- Supplies and accessories
- Service and support
- Product specifications
- Regulatory information
- Index

Scan to a workflow destination
NOTE: This product feature is provided by the optional Digital Sending Software.
If the system administrator has enabled the workflow functionality, you can scan a document and
send it to a custom workflow destination. A workflow destination gives you the ability to send
additional information, along with the scanned document, to a specified network or file transfer
protocol (FTP) location. Prompts for specific information appear on the control-panel display. The
system administrator can also designate a printer as a workflow destination, which allows you to scan
a document and then send it directly to a network printer for printing.
1. Place the document face down in the document feeder.
2. From the Home screen, touch a workflow button.
3. Complete the fields. The fields vary based on how your administrator has configured the
workflow.
4. Touch the Start button.
48 Chapter 6 Scan and send documents