
HP RIP Software - User Guide

4-14 Creating a Color Profile
Prepare the Printer 1. Load the printer with the media to profile. If profiling rigid media,
make sure to have a new sheet loaded before printing the test pat-
terns, which occurs at several points during procedure.
2. Make sure that the printer is calibrated and jetting well, with all jets
firing or substituted. Ensure that the media advance (media feed)
accuracy has been calibrated. The exact procedures vary by
printer. Refer to the printer’s User Manual for instructions.
3. Calibrate the external device (spectrophotometer) according to the
manufacturer’s instructions. The external device must be powered
on and connected to the RIP computer before starting the HP RIP
Software, or the device will not be recognized by the RIP.
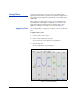
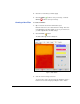
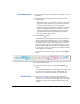
Basic Info 4. From the tree pane of the RIP interface, click the Profile Creation
icon.
The Basic Info screen appears in the detail pane.
5. Select a target printer and resolution.
6. Enter a name for the media.
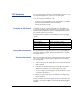
7. To create a heavy-coverage profile for backlit signage, check the
Backlit box.
Backlit profiles can be created and calibrated only with an X-Rite
DTP41T spectrophotometer.
8. Select the ink type from the drop-down list.
Depending on the printer, there may only be one type of ink, so no
selection is necessary or allowed.
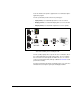
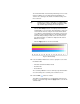
9. Configure the color set.
If you are using a printer that supports larger ink sets (beyond
CMYK), you can exclude some or all of the extended colors by
clicking on the color swatches shown. An “X” will appear on the
excluded colors. The minimum valid set for creating a profile is
CMYK.
On printers that have an extended ink set installed, all colors will be
printed and read to create all profiles, even profiles that use just
CMYK.
10. Click the Next ( ) button.
The Print Ramp Limits tab appears.