
ColorSpan Legacy System Control - User Guide


Adding and Configuring Ports 1-23
To Re-Route a Port
To route a port after its initial setup, follow these steps:
1. Position the cursor over the port icon.
2. Click and hold either mouse button to display the port
menu.
3. Select Route...
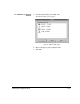
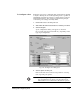
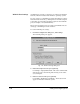
System Control displays the current routing path for the
selected port. The route is also described in the dialog box at
the bottom of the screen as shown in Fig. 1-10.
Note
By default, all ports are initially routed through the
Standard
input queue,
RIP
, the
Standard
output queue,
Printer
, and
RIP Saver
Temporar y.
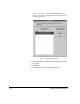
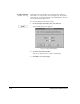
4. Choose a new routing path.
While the current routing path is displayed, click the left
mouse button on the icons for the input queue, output
queue, and printer you want to use. (Routing through the
RIP is automatic.) The new path appears as a green line
through the queues and printer you select. Your choices are
also reflected in text form in the routing dialog box. The
new path is effective for subsequent print jobs, but any jobs
currently spooling will use the former routing.
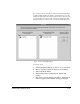
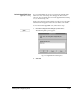
If you route a job to a RIP Saver or Output Hold queue
instead of the printer, RIPed files are saved or held but not
printed. In this case, a yellow dashed routing line extends to
the printer to indicate that it has not yet been printed.
To print the job and then save it, route it to the Priority or
Standard output queue, then to the printer, and then to a
RIP Saver queue.
5. Click on Save in the port's routing dialog box.
The routing for the selected port is saved.