
HP XP24000/XP20000 Virtual LVI/LUN (VLL) and Volume Shredder User Guide (T5214-96094, November 2011)

• The CV must not be a pool volume (pool-VOL).
• The CV must not be a journal volume.
• The CV must not be a remote command device.
• The CV must not be a volume used by Volume Security.
• The CV must not be a quorum system disk.
To convert a CV (custom-sized volume) back into an initialized FV (fixed volume):
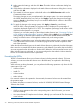
1. Make sure that Remote Web Console is in Modify mode.
For detailed information about Modify mode, see the HP XP24000/XP20000 Remote Web
Console User Guide.
2. In the tree on the left side of the Customized Volume window, open a folder, and select the
desired disk group, parity group, and VDEV. The table on the right side of the window shows
detailed information about the LDEVs of the selected VDEV.
If the selected VDEV contains one or more CVs that violate any restriction for the Volume
Initialize operations (see previous), you cannot perform the Volume Initialize operations.
Remove all invalid CVs before performing the Volume Initialize operations.
3. Right-click any part of the tree view and select Volume Initialize to display the Volume Initialize
dialog box (1).
4. On the Volume Initialize dialog box (1):
a. Select one or more VLL volume numbers.
b. Select a CU number from the Select CU No. list.
c. Select an LDEV number from the white LDEV numbers in the Select LDEV Number table.
The LDKC number, CU number, and LDEV number appear in the LDKC:CU:LDEV field.
d. To change an LDKC:CU:LDEV number that is already assigned, select one or more volume
numbers corresponding to the LDKC:CU:LDEV numbers that you want to remove, and
then right-click and select Clear.
5. After setting all CU numbers and LDEV numbers, click Next.
If the boundary area of the selected LDEV number does not have an SSID, the SSID setting
dialog box opens. Go to step 6. If the boundary area of the selected LDEV number has an
SSID, go to step 11.
6. On the SSID setting dialog box, select the CU number.
7. Select a new SSID in the Input SSID list. If you have logged in as a storage administrator and
the SSID number of another SLPR is used check box is selected, you can also enter an SSID
in the Input SSID list.
8. Click Set. The SSID is displayed in the SSID field of the SSID setting area.
9. To set two or more SSIDs, repeat steps 6 through 8.
10. After setting all SSIDs, click Next.
11. Verify that the information displayed in the Volume Initialize confirmation dialog box is correct,
and then click OK.
A notation appears across the top of the window to indicate that the volume has been
initialized, and the color of the VDEV icon that you manipulated in the tree view changes from
red to blue.
The setting changes are not yet implemented in the storage system. You cannot manipulate
VDEVs denoted by blue icons until you do either of the following, but you can initialize
additional VLL volumes in VDEVs denoted by red icons:
• Click Apply or Cancel.
• Right-click blue LDEVs, and select Reset.
66 Performing Virtual LVI/LUN and Volume Shredder Operations