
HP StorageWorks XP24000/XP20000 SNMP Agent Reference Guide (AE131-96088, May 2011)

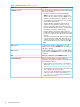

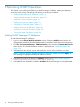
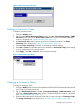
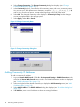
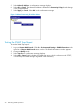
Table Of Contents
- XP24000/XP20000 SNMP Agent Reference Guide
- 1 Overview of SNMP
- 2 Using the SNMP GUI
- 3 Performing SNMP Operations
- 4 SNMP Supported MIB
- 5 SNMP Failure Trap Reference
- 6 Troubleshooting
- 7 Support and Other Resources
- Glossary
- Index
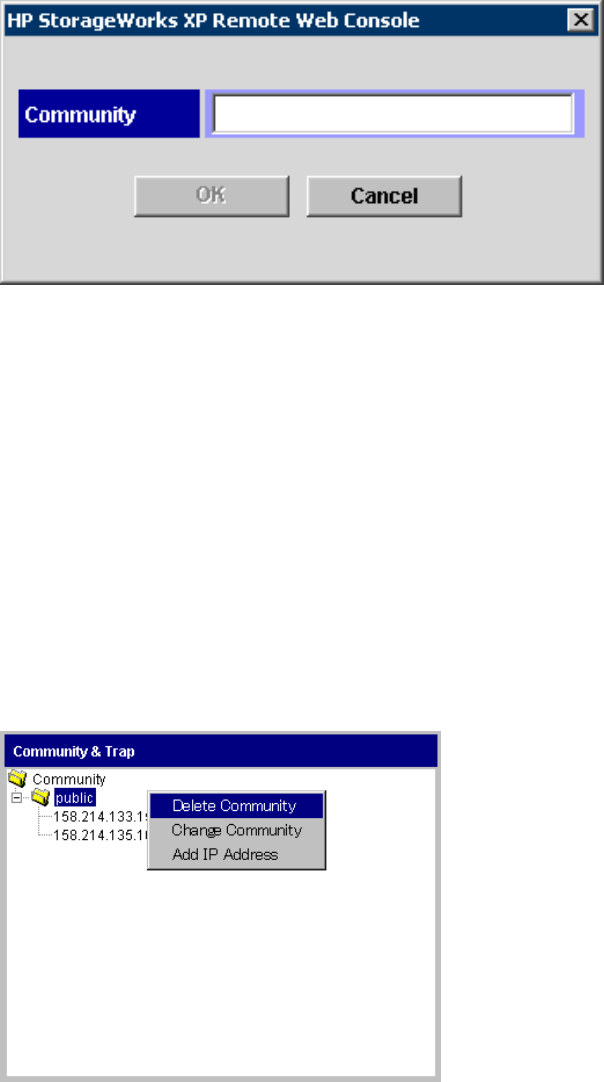
Figure 8 Add Community dialog box
Deleting a Community Name
To delete a community name:
1. Change to Modify mode.
2. Log on to open Remote Web Console Main window, click Go – Environmental Settings – SNMP
Information in the menu bar of Remote Web Console Main window. The SNMP Information
window is displayed (see “SNMP Information Tab” (page 11)).
3. In Community & Trap, select and then right-click the unwanted community. The Delete
Community menu displays (see “Delete Community Menu” (page 17)).
4. Select the Delete Community command. A confirmation message displays.
5. Select OK or Cancel. The selected community is deleted from Community & Trap, but the setting
is not yet implemented in the storage system.
6. Select Apply. Select OK or Cancel on the confirmation message.
Figure 9 Delete Community Menu
Changing a Community Name
To change a community name:
1. Change to Modify mode (see the HP StorageWorks XP24000/XP20000 Remote Web Console
User Guide if you need instructions).
2. Log on to Remote Web Console. Click Go – Environmental Settings – SNMP Information in the
menu bar of Remote Web Console Main window. The SNMP Information window is displayed
(see “SNMP Information Tab” (page 11)).
3. Select and then right-click the community name that you want to change in Community & Trap.
The Change Community menu displays (see “Change Community Menu” (page 18)).
Deleting a Community Name 17