
HP StorageWorks Snapshot XP user guide (T1713-96023, October 2006)

NOTE:
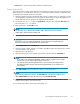
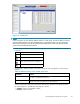
You can enter only a whole number from 1 to 256 in the Number of V-VOL box.
11. Click Set. Volumes are added to the V-VOL information setting list (middle of the pane).
To create more V-VOLs, repeat step 7 through step 1 1.
NOTE:
Using Snapshot XP, you cannot add new V-VOLs to the V-VOL group when creating
V-VOLs. Ensure that you add enough V-VOLs to create the Snapshot XP pairs at this point.
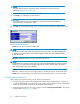
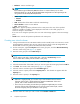
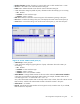
12. Click Next. The Create V-VOL wizard pane (2) (Figure 15)appears.
13. Select the volume in the V-VOL information setting list (upper-right area of pa ne).
14. Select the CU number from the Select C U No. list. Areas of the selected CU appear in the Select
LDEV No. area
(middle of pane) .
NOTE:
• Only areas displayed by white cells are available for V-VOLs. You cannot use areas
displayed by gray cells to create V-VOLs.
•ToselectCU
s belonging to other SLPRs, select the CU number of another SLPR is
used. check box.
15. Select the interval bet ween LD EV numbers from the Interval list.
NOTE:
If you select 0, the LDEV number is sequential.
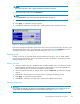
16. Select the area in t he Select LDEV No. area. The color of the selected area changes to blue.
CU and LDEV numbers are added to the V-VOL information setting list, and b lue italics changes
to black normal.
To set multiple V-VOLs, repeat step 13 through step 1 6.
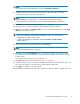
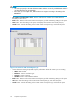
17. Click Next. The Create V-VOL wizard pane (3) (Figure 16)appears.
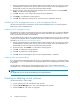
18. Check the settings. If there is no problem, click OK . The Create V-VO L wizard pane (3) closes, and
the V -VOL pane appears. In the V -VOL pane, settings appear in blue italics.
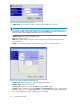
19. Click Apply.Aconfirmation message appears.
20. Click OK.Theconfirmation message closes, and the new V-VOL informa tion is applied to the array.
HP StorageWorks Snapshot XP user guide
57