
HP Remote Graphics Software 7.0


details in the Results panel. This information can be used to determine what the test looked for, why it
failed, whether the failure will prevent connections, and suggestions on how to fix the problem.
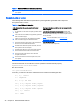
The RGS Diagnostics Tool can be run any time after RGS Sender installation. To run the RGS
Diagnostics Tool, use Windows Explorer to display the RGS Sender installation folder, and locate
rgdiag.exe. This tool is normally located at:
C:\Program Files\Hewlett-Packard\Remote Graphics Sender\rgdiag.exe
TIP: For 64-bit systems, use Program Files (x86).
Using the RGS Admin Tool (Windows only)
The RGS Admin Tool can be used to enable and disable both Single Sign-on and Easy Login. For a
normal RGS Sender installation, this tool can be found at:
C:\Program Files\Hewlett-Packard\Remote Graphics Sender\rgadmin.exe
TIP: For 64-bit systems, use Program Files (x86).
RGS Sender logging (Windows only)
RGS Sender logging is not controlled by a GUI—instead, RGS Sender logging is controlled by a
particular file in the RGS Sender installation directory. The default file used is logSetup. See
RGS
Sender command line options on Windows on page 39 for information on how to specify a different
file using the command line.
The logSetup file is used to specify where the log output goes (to a file or to a standard error) as well
as the type of output logged. By default, the logSetup file is set to send output to a file named rg.log
at the INFO level.
If another logging level is required, edit the file to replace INFO with any of the following: DEBUG,
WARN, ERROR, or FATAL.
NOTE: The logSetup file is set to read-only during RGS Sender installation, so you’ll need to
uncheck the Read-only property to edit the file.
NOTE: To log Remote Clipboard activities on the RGS Sender, DEBUG-level logging (not the
default INFO-level logging) must be specified in the logSetup file.
42 Chapter 7 Using the RGS Sender