
HP Remote Graphics Software 7.0


1 Getting started in Windows
The chapter provides a quick guide for Windows users to install and use HP Remote Graphics
Software (RGS) in common scenarios.
To install RGS:
IMPORTANT: Be sure you are logged in to an account with administrator privileges before
performing installation:
1. Install the RGS Sender on the remote computer using the default options.
2. Install the RGS Receiver on the local computer using the default options.
NOTE: For information about more advanced installation options, see Installing RGS on Windows
on page 12.
To start the RGS Receiver:
▲
Windows 7: Select Start > All Programs > HP > HP Remote Graphics Software > HP RGS
Receiver.
Windows 8: Select the HP RGS Receiver tile on the Start screen.
To create an RGS connection:
1. In the Hostname or IP address field, type the hostname or IP address of the remote computer
that is on the same network and has the RGS Sender installed, and then press Enter or click
Connect.
2. Type the username and password in the fields, and click OK.
NOTE: The username and password are the same credentials that you would use to log in to
Windows on the remote computer.
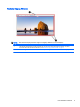
If the connection succeeds, the Remote Display Window will appear and display the desktop session
of the remote computer.
NOTE: If the remote desktop is locked, you will need to enter your credentials a second time to
unlock it. If the prompt instructs you to press Ctrl+Alt+Del to initiate this process, you must instead
press Ctrl+Alt+End to trigger the desired response on the remote computer. Pressing Ctrl+Alt+Del will
always trigger a response on the local computer.
1