
HP Apollo a6000 Chassis Setup and Installation Guide


Installing the chassis 17
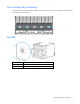
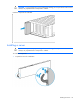
1.
Install the chassis into the rack.
2. Secure the chassis to the rack.
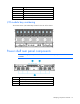
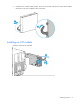
Installing the system components
If components were removed during the chassis installation or additional components were ordered, install
each device using the procedures in this section.
If you perform any of the procedures in this section after powering on the chassis, ensure proper airflow by
ensuring that each bay inside the chassis and at the rear of the chassis is populated with either a component
or a blank. For component-specific replacement information, see the HP Apollo a6000 5U Chassis
Maintenance and Service Guide or the server-specific user and maintenance guides on the HP website
(http://www.hp.com/go/docs).
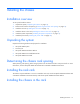
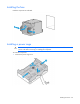
Installing a server tray blank