
HP Graphics Server Blade VMware vDGA Quick Start


Technical white paper | HP Hardware Accelerated Graphics for Desktop Virtualization
4
Setting up VMware for GPU Accelerated VDI vDGA
Configuring vDGA pass-through device via Virtual Center
1. Update the WS460c Graphics Server Blade with the latest HP SPP firmware by booting to the SPP DVD.
You can obtain the latest SPP at: http://www.hp.com/go/spp
2. Insure the System BIOS level is at least 9/20/2013
You can obtain the required System BIOS at:
ftp://ftp.hp.com/pub/softlib2/software1/pubsw-windows/p1326513305/v92429
3. Setup system BIOS for installation
a. Boot to the HP RBSU (BIOS configuration utility) by pressing F9 during boot
b. Go to and select “System Default Options” > “Restore Default Options” and select to restore
c. After reset boot back into HP RBSU (BIOS configuration utility) by pressing F9 during boot
d. Set video mode to “SETUP”
i. Select System Options
ii. Select Remote Console Mode
iii. Set to “SETUP” mode
e. Set blade to static high performance mode
i. Select Power Management Options > HP Power Profile
ii. Select and enable “Maximum performance”
4. Install and complete basic configuration of vSphere host according to your specification
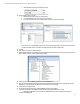
5. Ensure graphics cards are properly installed in workstation blade
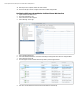
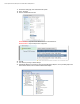
6. Confirm GPU is seen by host, Enter Following Command:
# esxcli hardware pci list –c 0x0300 –m 0xff
You should see an output similar to the following:
000:001:00.0
Address: 000:001:00.0
Segment: 0x0000
Bus: 0x01
Slot: 0x00
Function: 0x00
VMkernel Name:
Vendor Name: NVIDIA Corporation
Device Name: NVIDIA Quadro 6000
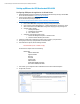
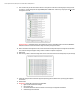
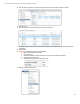
7. From vCenter, go to configuration tab for vDGA host server and select “Advanced Options”
8. On right side, click “Edit”