
HP Graphics Server Blade Microsoft RemoteFX vGPU Quick Start

Solution Quick Start Guide | HP Graphics Server Blade Microsoft RemoteFX vGPU Quick Start
11. If you have not done so, install Hyper-V role and Remote Desktop Virtualization Host role according to Microsoft
documentation
12. Go to control panel > Systems > Advanced > Remote tab, and turn on remote access
13. Determine the hostname or IP of your server and note it
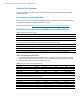
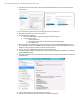
14. Setup system BIOS for Production
a. Boot to the HP RBSU (BIOS configuration utility) by pressing F9 during boot.
b. Set video mode to “USER”
i. Select System Options
ii. Select Remote Console Mode. The current Remote Console Mode appears.
iii. Set to “USER” mode
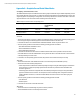
15. Boot systems. When the systems boots you will get a message that states “The HP WS460c Blade Workstation is
now in USER MODE”. This means the NIVIDIA controller is primary video device and the embedded Matrox control is
disabled. To manage the system you must use remote console at this point
16. Log on to the system via RDP with the server name or IP you recorded earlier
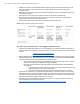
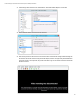
17. Go to device manager and under “Display Adapters” you should see the new NVIDA card listed ONLY, as the Matrox is
disable and NVIDIA is enabled
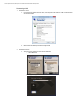
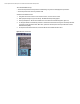
18. Open Hyper-V Manager and select the “Physical GPU” setting in Hyper-V Settings to confirm the GPU is available for
use by RemoteFX.
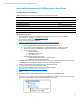
19. Create or import Windows 7 or 8 virtual machines into you server.
20. After creating and configuring the virtual machine, go to virtual machine settings.