
HP ProLiant SL250s Gen8 Server Maintenance and Service Guide


Removal and replacement procedures 47
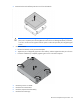
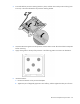
8.
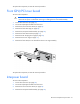
Install the server into the chassis.
9. Connect the peripheral cables.
10. Press the Power On/Standby button.
The server exits standby mode and applies full power to the system. The system power LED changes
from amber to green.
Processor
WARNING: To reduce the risk of personal injury from hot surfaces, allow the drives and the
internal system components to cool before touching them.
CAUTION: To prevent possible server malfunction and damage to the equipment, multiprocessor
configurations must contain processors with the same part number.
CAUTION: The heatsink thermal interface media is not reusable and must be replaced if the
heatsink is removed from the processor after it has been installed.
CAUTION: To prevent possible server overheating, always populate processor socket 2 with a
processor and a heatsink or a processor socket cover and a heatsink blank.
IMPORTANT: Processor socket 1 must be populated at all times or the server does not function.
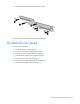
To remove the component:
1. Power down the server (on page 24).
2. Disconnect all peripheral cables from the server.
3. Remove the server from the chassis (on page 24).
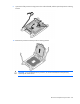
4. Remove the front GPU cage (on page 26).
5. Remove the interposer board assembly (on page 26).
6. Remove the front GPU bracket (on page 27).
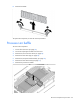
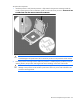
7. Remove the processor air baffle ("Processor air baffle" on page 44).
8. Remove the heatsink ("Heatsink" on page 45).