
Microsoft BackOffice Small Business Server 4.5 Installation Instructions for Compaq Prosignia and ProLiant Servers

Microsoft BackOffice Small Business Server 4.5 Installation Instructions for Compaq Prosignia and ProLiant Servers 9
13J6-1000A-WWEN
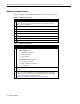
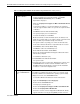
Table 6. Creating SSD for Windows NT 4.0 diskettes using an earlier version of SmartStart (continued)
√
√√
√
Procedures Steps
!
Creating support
software diskettes
(continued)
7. Click Finish to exit the Diskette Builder Utility.
8. Click Exit.
9. Click OK to exit the upgrade process.
10. Insert the Server Profile diskette when prompted, then click OK.
11. Remove the CD and Server Profile diskette when the system restarts.
12. Follow the steps in the next procedure “Displaying the contents of the
NTREADME.HLP file” and then start the installation of Microsoft
BackOffice SBS 4.5 by following the steps listed in the “Installation
Instructions” section of this White Paper.
!
Displaying the contents
of the NTREADME.HLP
file
You will need to know the location of certain files on the Compaq SSD for
Windows NT. In addition, you must perform this procedure on a separate
system (one that has a Windows 95 or Windows NT operating system
installed).
To display the contents of the NTREADME.HLP file:
1. Insert Compaq SSD for Windows NT diskette #1 into the diskette
drive.
2. Right-click Start →
→→
→ Explore →
→→
→ 3 ½ Floppy (A:).
3. Double-click the NTREADME.HLP file.
The Help Topics window appears.
4. Double-click Compaq Server Support for Microsoft Windows NT.
5. Double-click Compaq SSD for Windows NT.
A list of the contents of each Compaq SSD for Windows NT diskette
appears. Print this screen (by pressing Ctrl+P) for future reference.