
ProLiant ML110 Generation 2 Server Maintenance and Service Guide


Removal and Replacement Procedures
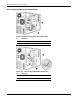
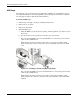
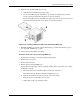
Figure 2-15: Removing the IDE CD-ROM drive
5. Place the old CD-ROM on a static-dissipating work surface or inside an anti-static bag.
6. Remove the new CD-ROM from its protective packaging.
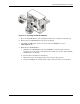
7. Check that the IDE jumper on the rear section of the CD-ROM drive is set to
Cable-Select mode.
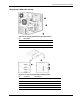
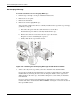
8. Install the new CD-ROM drive:
a. Guide the new CD-ROM drive into the CD-ROM bay, with the cable connectors
facing the rear of the chassis, then push the drive all the way into the chassis until the
mounting holes are aligned.
b. Press the drive-retaining lever downward.
c. Move the lever into its retaining hook to secure the new drive in place.
d. Connect the IDE power and data cables to their connectors on the rear of the drive.
HP ProLiant ML110 Generation 2 Server Maintenance and Service Guide 2-15