
HP ProLiant DL360 G6 Server User Guide
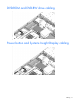


Table Of Contents
- HP ProLiant DL360 G6 Server User Guide
- Abstract
- Notice
- Contents
- Component identification
- Front panel components
- Front panel LEDs and buttons
- Rear panel LEDs and buttons
- System board components
- HP Systems Insight Display LEDs
- Systems Insight Display LED combinations
- SAS and SATA device numbers
- SAS and SATA hard drive LEDs
- SAS and SATA hard drive LED combinations
- Fan modules
- T-10/T-15 Torx screwdriver
- Operations
- Setup
- Hardware options installation
- Introduction
- Processor and fan module option
- Memory options
- Hot-plug SAS and SATA hard drive options
- DVD-ROM and DVD-RW drive option
- Hard drive blackplane option
- Controller options
- Expansion board options
- HP ProLiant DL360 G6 PCI thermal - power option
- HP NC522SFP Dual Port 10GbE Server Adapter option
- Redundant hot-plug power supply option
- HP Trusted Platform Module option
- Cabling
- Software and configuration utilities
- Troubleshooting
- System battery
- Regulatory compliance notices
- Regulatory compliance identification numbers
- Federal Communications Commission notice
- Declaration of conformity for products marked with the FCC logo, United States only
- Modifications
- Cables
- Canadian notice (Avis Canadien)
- European Union regulatory notice
- Disposal of waste equipment by users in private households in the European Union
- Japanese notice
- BSMI notice
- Korean notice
- Chinese notice
- Laser compliance
- Battery replacement notice
- Taiwan battery recycling notice
- Power cord statement for Japan
- Acoustics statement for Germany (Geräuschemission)
- Electrostatic discharge
- Specifications
- Technical support
- Acronyms and abbreviations
- Index
Software and configuration utilities 76
Configuring mirrored memory
To configure mirrored memory:
1. Install the required DIMMs ("Installing a DIMM" on page 44).
2. Access RBSU by pressing the F9 key during power-up when the prompt is displayed.
3. Select System Options.
4. Select Advanced Memory Protection.
5. Select Mirrored Memory with Advanced ECC Support.
6. Press the Enter key.
7. Press the Esc key to exit the current menu or press the F10 key to exit RBSU.
For more information on mirrored memory, see the white paper on the HP website
(http://h18000.www1.hp.com/products/servers/technology/memoryprotection.html).
Configuring lockstep memory
To configure Lockstep memory:
1. Install the required DIMMs ("Installing a DIMM" on page 44).
2. Access RBSU by pressing the F9 key during power-up when the prompt is displayed.
3. Select System Options.
4. Select Advanced Memory Protection.
5. Select Lockstep with Advanced ECC Support.
6. Press the Enter key.
7. Press the Esc key to exit the current menu, or press the F10 key to exit RBSU.
For more information on Lockstep memory, see the white paper on the HP website
(http://h18000.www1.hp.com/products/servers/technology/memoryprotection.html).
Array Configuration Utility
ACU is a browser-based utility with the following features:
• Runs as a local application or remote service
• Supports online array capacity expansion, logical drive extension, assignment of online spares, and
RAID or stripe size migration
• Suggests the optimum configuration for an unconfigured system
• Provides different operating modes, enabling faster configuration or greater control over the
configuration options
• Remains available any time that the server is on
• Displays on-screen tips for individual steps of a configuration procedure
• Beginning with ACU version 8.28.13.0, provides diagnostic functionality on the Diagnostics tab
(formerly known as Array Diagnostics Utility).
For optimum performance, the minimum display settings are 1024 × 768 resolution and 16-bit color. Servers
running Microsoft® operating systems require one of the following supported browsers:
• Internet Explorer 6.0 or later